
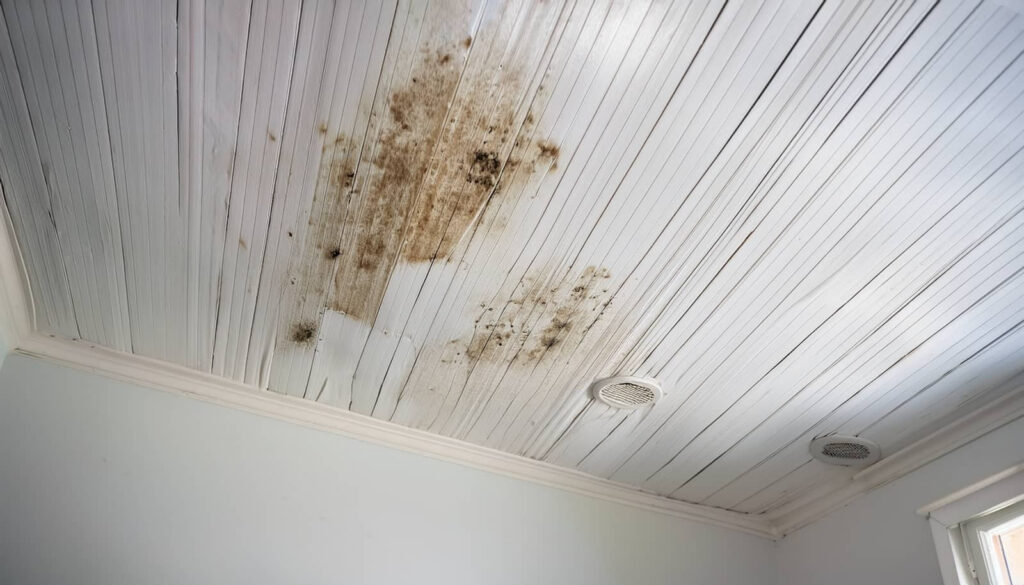
A ceiling leak can turn a small problem into a major repair quickly. Ceiling water damage repair should begin by stopping the water source, then checking for sagging drywall, stains, and signs of hidden mold risk. Once the area is properly dried, you can determine whether patching is enough or if replacement makes more sense. The next steps matter because one missed detail can lead to another costly ceiling failure.
Key Takeaways
- Stop the leak first by shutting off water, covering roof openings, or calling a professional for immediate repair.
- Check the ceiling for sagging, cracks, stains, or soft spots before anyone works below it.
- Dry the area quickly with fans, dehumidifiers, towels, and removed furniture to limit further damage.
- Replace water-damaged drywall if it is crumbling, bowed, moldy, or still trapping moisture.
- Prevent future damage with regular roof, plumbing, attic, and gutter inspections, plus good ventilation.
Find and Stop the Ceiling Leak
Before you repair the ceiling, you need to find the source of the leak and stop it completely, whether it’s coming from a roof leak, a plumbing failure, or another hidden moisture problem.
You’ll get better ceiling water damage repair results when you trace the wet path upward, inspect nearby fixtures, and check for active dripping.
Shut off the affected water line if plumbing’s involved, then secure roof openings with a temporary cover until a pro can make a lasting fix.
Don’t rush the repair before the source is controlled, because trapped water keeps spreading and weakens the finish.
When you act methodically, you protect your home and join the many homeowners who handle damage with confidence, calm, and practical know-how.
Check for Unsafe Ceiling Damage
After you stop the leak, inspect the ceiling for sagging sections, since bowed or soft drywall can signal structural weakness and hidden moisture.
Look closely for visible cracks and stains, because they often mark areas where water has saturated the material or damaged the finish.
If you spot either issue, treat the area as unsafe until you’ve confirmed the ceiling is dry and stable.
Sagging Ceiling Sections
When a ceiling starts to sag, you should treat it as a potential safety hazard, not just a cosmetic issue.
You may see the drywall bow, dip, or feel soft when you press near the affected area. That usually means moisture has weakened the ceiling assembly, and the load can shift without warning.
Stay clear of the section, keep people and pets away, and shut off the source of water if you can do so safely.
If the sag is spreading or pulling from the framing, you need professional support right away. A trained technician can inspect the cavity, confirm whether insulation or joists are compromised, and recommend safe removal and repair.
Acting quickly helps your home stay secure and helps your household feel protected.
Visible Cracks And Stains
Visible cracks and stains can signal more than cosmetic wear, so you should inspect them closely for signs of unsafe ceiling damage. You’re looking for spreading lines, brown rings, peeling paint, and soft spots that suggest moisture has moved through the assembly.
Check whether the crack runs across joists, widens after rain, or appears near fixtures, because those clues can point to structural stress or hidden leakage.
- Note any discoloration changes
- Press gently for spongy areas
- Photograph damage for comparison
- Watch for moldy odors
- Call a pro if movement grows
When you stay alert and act early, you help protect your home and keep your household confident.
Dry Ceiling Water Damage Fast
Act quickly to dry ceiling water damage before stains spread, drywall softens, or hidden moisture leads to bigger repairs.
You should stop the source first, then improve airflow with fans and open windows if weather allows.
Run a dehumidifier to pull moisture from the room and keep indoor humidity low.
Gently blot dripping areas with clean towels, but don’t press hard and spread water deeper into seams.
If the ceiling feels cool or damp, monitor it every few hours with your hand or a moisture meter.
Remove furniture and protect flooring so you can work safely and keep your space together.
When you dry the area fast, you reduce odor, limit microbial growth, and give your home a better chance to recover cleanly.
Decide Whether to Replace the Drywall
Now assess whether the drywall can stay or needs replacement. If the panel feels soft, bows, or crumbles when you press it, replacement’s safer.
You also want to replace it if the water line is high, the paper face has peeled, or you see mold, stains, or a lingering musty odor. Small, dry, edge-only spotting may not mean failure, but hidden saturation can spread above the ceiling.
Trust your inspection, and don’t rush it.
- Check for sagging seams
- Probe for softness
- Look for discolored fasteners
- Confirm no trapped moisture
- Compare damaged and sound areas
When you choose replacement, you’re protecting the whole room and joining the group of homeowners who solve the problem before it grows.
Patch and Repaint the Water-Damaged Ceiling
If the ceiling drywall is still firm, dry, and structurally sound, you can move on to patching the damaged area and restoring the finish.
Cut away loose paper, scrape flaky paint, and feather the edges so the repair blends smoothly.
Apply a stain-blocking primer to seal any remaining discoloration, then fill dents or seams with joint compound using thin, even coats.
Let each coat dry fully, sand lightly, and recoat until the surface feels level with the surrounding ceiling.
Match the existing texture with a sponge, roller, or spray technique before painting.
Finish with ceiling paint in two coats, extending slightly beyond the repair for uniform sheen.
You’ve got this, and a careful process helps the whole room look cohesive again.
Prevent Future Ceiling Leaks
You can reduce future ceiling leaks by inspecting your roof regularly for missing shingles, damaged flashing, and blocked gutters, then fixing issues before water penetrates the structure.
You should also maintain plumbing fixtures by checking supply lines, drain joints, and connections for slow leaks or corrosion.
Improve attic ventilation to control heat and moisture buildup, which helps protect framing, insulation, and drywall from recurring water damage.
Inspect Roof Regularly
A twice-yearly roof inspection can catch small problems before they turn into ceiling water damage. You should check shingles, flashing, vents, and sealant after storms and again before winter.
Look for lifted edges, cracked surfaces, rusted fasteners, and debris that traps moisture. Use binoculars from the ground if you can’t access the roof safely.
- Verify shingles lie flat and overlap correctly
- Inspect flashing around chimneys and skylights
- Clear leaves from valleys and gutters
- Check for soft spots or sagging decking
- Note any stain lines or granule loss
When you spot damage early, you protect your home’s structure and keep your household comfortable.
Regular attention helps you stay ahead of leaks, and you’ll feel confident knowing your roof is doing its job.
Maintain Plumbing Fixtures
Even a small drip from a supply line or valve can soak drywall above and turn into ceiling water damage, so make plumbing checks part of your routine maintenance.
Inspect faucets, shutoff valves, toilet connections, and under-sink traps for corrosion, mineral buildup, and dampness. Tighten loose fittings carefully, and replace worn washers, braided lines, and supply hoses before they fail.
Test appliance connections behind dishwashers, refrigerators, and water heaters, because hidden leaks often spread slowly into joists and ceiling cavities.
If you spot staining, bubbling paint, or a musty odor, shut off the water and call a licensed plumber quickly.
When you stay ahead of minor plumbing issues, you protect your home, avoid costly ceiling repairs, and keep your household safer together.
Improve Attic Ventilation
When warm, moist air gets trapped in the attic, it can condense on the underside of the roof and eventually lead to ceiling stains, sagging drywall, or hidden water damage.
You can stop that cycle by improving airflow, which helps your home breathe and keeps your repairs lasting longer. Check that soffit vents stay clear, ridge vents run continuously, and insulation doesn’t block intake openings.
- Seal attic bypasses around lights and ducts
- Add balanced intake and exhaust vents
- Replace damaged vent screens
- Use baffles to protect airflow paths
- Schedule seasonal roof and attic inspections
If you notice musty odors or frost, act quickly.
Good ventilation supports your ceiling repair, protects your space, and helps your household feel secure together.
Frequently Asked Questions
How Much Does Ceiling Water Damage Repair Typically Cost?
You’ll typically pay $200 to $1,500 for ceiling water damage repair, depending on stain removal, drywall replacement, insulation drying, and repainting. If damage spreads or mold appears, costs can climb higher, so act quickly.
Should I Call My Insurance Before Making Repairs?
Yes—you should call your insurer first; nearly 1 in 4 water-damage claims get reduced for delayed reporting. You’ll protect coverage, document damage, and your adjuster can guide approved emergency repairs so you stay supported.
Can Ceiling Water Damage Cause Mold Behind the Walls?
Yes, ceiling water damage can cause mold behind your walls if moisture stays trapped. You should inspect quickly, dry materials thoroughly, and remove damaged drywall so you protect your home and feel confident about repairs.
How Long Does a Repaired Water-Stained Ceiling Last?
It often lasts years, and you’ll notice a coincidence: a repaired stain can stay invisible until moisture returns. If you’ve fixed the source well, sealed, painted, and dried thoroughly, your ceiling should stay sound for many years.
Do I Need a Professional for Minor Ceiling Leaks?
You don’t always need a professional for minor ceiling leaks, but you should inspect for hidden moisture, sagging drywall, and active drips. If damage spreads or you’re unsure, hire one to protect your home.
Recap
You’ve done the hard work: you found the leak, stabilized the ceiling, and dried the damaged area. Now you can finish with confidence. If the drywall is sound, patch it, prime it, and repaint for a clean result; if it’s weak or sagging, replace it to protect your home’s structure. Keep gutters clear, watch plumbing, and inspect after storms. A small drip can become a wrecking ball, so staying proactive keeps your ceiling safe.