
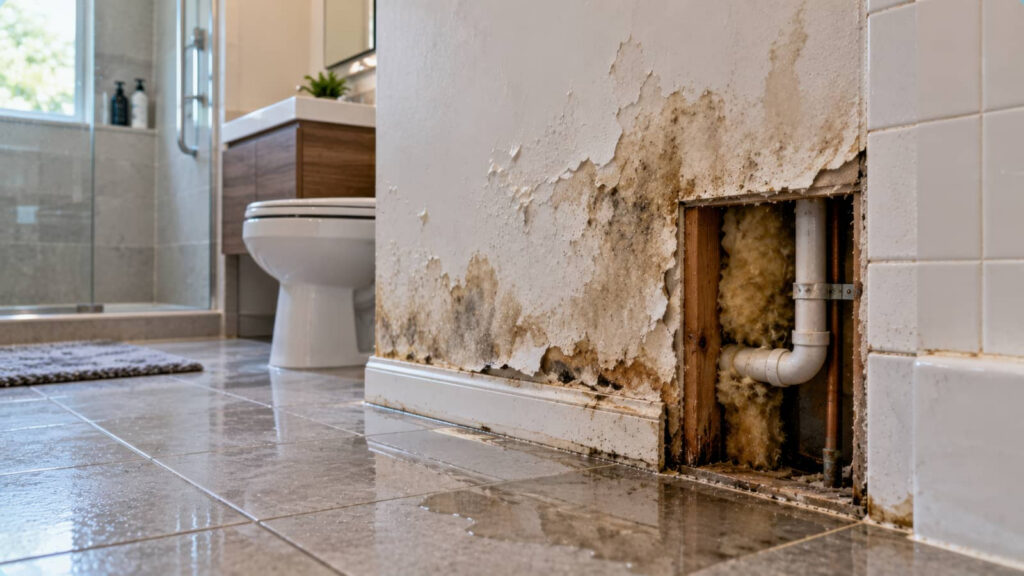
If you spot soft spots, sagging seams, or discoloration in your drywall after a leak, you need to act quickly because hidden moisture can weaken the wall and encourage mold. You can sometimes dry minor damage, but once saturation lingers beyond 24 hours, replacement often becomes the safer option. Before you cut into the wall, you should check the surrounding materials, since the next step depends on what’s still trapped inside.
Key Takeaways
- Replace drywall that is soft, swollen, sagging, stained, or wet longer than 24–48 hours.
- Check for hidden moisture, mold, and damaged framing before closing up the wall.
- Cut out compromised drywall to solid material, then install, tape, and finish replacement pieces.
- Fix the water source first, whether from plumbing, roofing, windows, or HVAC leaks.
- Prevent future damage by controlling humidity, improving ventilation, and maintaining gutters and drainage.
When Drywall Needs Replacement
When drywall stays saturated for too long, you usually need to replace it rather than repair it.
In drywall repair after water damage, you should treat prolonged moisture exposure as a structural limit, not a cosmetic issue. Once the gypsum core loses rigidity, the panel can’t regain full strength, and patching won’t give you a durable result.
You’ll often choose replacement when the sheet has softened, warped, or broken at fasteners. Cutting out the damaged section lets you restore a stable surface that matches the rest of your wall.
If you’re working in a shared property, making this call quickly helps your space stay safe, consistent, and ready for the next step.
Check for Saturation, Mold, and Damage
Check moisture levels with a meter to confirm whether the drywall is still saturated or has dried to an acceptable range.
Inspect the surface and backing for mold growth, especially in seams, corners, and hidden areas where moisture can persist.
Assess the material for softening, swelling, crumbling, or loss of structural integrity, since these signs indicate damage that can’t be repaired in place.
Check Moisture Levels
Before you repair water-damaged drywall, you need to confirm that it’s fully dry and still structurally sound. Use a moisture meter to check the board, framing, and adjacent materials, especially around seams, outlets, and base plates.
Compare readings with dry areas in the same room so you can spot hidden saturation. If the drywall feels cool, soft, swollen, or crumbly, it may still hold excess water and can’t support patching yet.
You should also look for staining, sagging, or delamination, since these signs often indicate material failure. Keep the area ventilated and continue drying until moisture levels return to normal.
When you verify dryness carefully, you protect your property, your repair investment, and the shared comfort of everyone who uses the space.
Inspect Mold Growth
Once the drywall reads dry, inspect it closely for mold and hidden damage before you repair anything. You’re protecting your property and the people who live or work there. Look for staining, musty odors, and any fuzzy or discolored growth along seams, corners, and fasteners.
Check behind trim and outlet covers for concealed spotting.
Feel for cool, damp areas that suggest lingering saturation.
Note any recurring odor after ventilation, which can signal active mold.
If you see contamination, isolate the area and keep airflow controlled until you know the extent. Don’t seal over suspect material; that can trap spores and make future repairs less reliable.
Careful inspection helps you move forward with confidence, align with safe building practice, and keep your space ready for the next repair step.
Assess Material Damage
Now that the drywall is dry, you need to assess the full extent of material damage before you repair or replace anything. Press on the surface to confirm stiffness; soft spots, crumbling gypsum, and bowed panels signal saturation damage.
Check seams, corners, and fastener heads for staining, swelling, or separation, since these areas often retain moisture longer. Inspect the paper facing for discoloration, delamination, and musty odor, which can indicate hidden mold even after visible drying.
If the board feels brittle, flakes when touched, or has lost structural integrity, plan to cut out and replace the affected section. You’re protecting a healthy, reliable space for everyone when you document the damage carefully and choose repairs that match the material condition, not just the surface appearance.
Drywall Repair After Water Damage
You should assess the drywall for residual saturation, since trapped moisture can keep materials unstable and slow recovery.
Check for mold growth and structural compromise, because visible staining, softening, or crumbling often indicates deeper damage.
If the drywall hasn’t fully dried or shows significant deterioration, you should replace it rather than repair it.
Assessing Water Saturation
Evaluating water saturation starts with determining how deeply the drywall has absorbed moisture, because repair decisions depend on whether the material is only damp, heavily saturated, or structurally compromised. You can check the wall with a moisture meter, touch the surface for coolness, and inspect edges near baseboards and seams.
When you assess the area, focus on:
- Surface dampness that may dry with ventilation
- Softened or swollen gypsum that usually needs replacement
- Consistent moisture readings that show deeper penetration
You’ll make better calls when you compare affected and dry sections side by side. If the panel still feels firm and readings drop as drying continues, you may keep it in service.
If moisture lingers in the core, you should remove and replace it so your property stays sound and your team stays confident.
Mold and Structural Risks
When drywall stays wet long enough, mold can begin colonizing the paper face and gypsum core, and that risk rises sharply if drying stalls or the wall cavity stays humid.
You should treat any lingering dampness as a biological and structural warning, because spores can spread into adjacent materials and elevate indoor air concerns.
You’ll also want to watch for sagging, softening, or joint separation, since moisture weakens the board’s integrity and can reduce fastener holding strength.
If framing behind the wall remains wet, you’re looking at a broader risk to insulation, sheathing, and trim.
Prompt ventilation, dehumidification, and moisture monitoring help protect your space and keep your repair team aligned.
When Drywall Needs Replacement
Drywall needs replacement if the panel stays swollen, soft, crumbling, or delaminated after drying, because those changes usually mean the gypsum core has lost structural integrity. You shouldn’t patch material that can’t support fasteners or finish coats.
Replace drywall that shows mold staining, because hidden growth often spreads behind the paper face.
Replace sections with persistent odor or discoloration, since they can signal trapped moisture.
Replace any panel near prolonged saturation, because repeated wetting weakens seams and joints.
If you’re unsure, test the wall cavity, framing, and insulation before you decide. You’ll protect your space and stay aligned with a crew that values clean, durable results.
When the substrate fails, full removal and replacement usually gives you the most reliable, code-ready repair.
Prep the Wall Before Repairs
Before you start any patching, clear the work area and remove loose paint, damaged joint compound, and any drywall that’s soft, swollen, or crumbling.
Use a utility knife or sanding block to create clean, stable edges around the affected area, then vacuum dust so new materials can bond properly.
Check the framing, insulation, and adjacent surfaces for visible moisture, staining, or odor that could signal lingering dampness. If the wall feels cool or reads damp on a meter, wait until it dries fully before proceeding.
Protect nearby flooring and trim with plastic or drop cloths, and keep ventilation moving to support drying.
Careful prep helps you and your property team create a sound repair base and reduces the chance of future failure.
Repair or Replace Wet Drywall
Now that the damaged area is clean and exposed, decide whether the drywall can be saved or needs replacement based on how much water it absorbed, how long it stayed wet, and whether mold or structural damage is present.
You can usually keep drywall that only saw brief, minor moisture and dried fully without soft spots. Replace it if it feels swollen, crumbles, or shows staining that won’t wipe away.
- Check for sagging seams and loose fasteners
- Press the surface for softness or spongy sections
- Inspect both faces for discoloration and odor
If the panel stayed wet for more than 24 to 48 hours, replacement is the safer choice.
When you act quickly, you protect your home, reduce risk, and stay in control with your repair team.
How Pros Fix Water-Damaged Drywall
When the damage is beyond a simple patch, pros cut out the compromised drywall back to solid material, verify the cavity is fully dry, and check framing, insulation, and fasteners before closing the wall.
You’ll often see them measure moisture with a meter, then remove any paper facing that’s swollen, delaminated, or stained. If they find mold, they treat the area and contain dust before they proceed.
Next, they install a properly sized replacement piece, secure it to sound backing, tape joints, and apply joint compound in thin, even coats.
After each coat dries, they sand, inspect, and recoat as needed.
Finally, they match texture and prime the repair so your wall blends in cleanly and you can feel confident in the result.
Prevent Future Water Damage
To reduce the chance of repeat drywall damage, you’ll want to correct the moisture source, not just repair the wall. You should inspect plumbing joints, roof penetrations, windows, and HVAC condensate lines for leaks, then seal or replace failing components.
Afterward, verify that drying is complete before you close the wall.
- Install a humidity monitor and keep indoor relative humidity between 30% and 60%.
- Extend gutters and downspouts so water drains away from the foundation.
- Use bathroom and kitchen exhaust fans during and after moisture-producing activities.
If you belong to a property team, document each fix and schedule routine inspections. That way, you’ll catch small failures early, protect material stability, and reduce mold risk before it spreads through adjacent drywall.
Frequently Asked Questions
How Long Should Drywall Dry Before Painting?
You should let drywall dry completely, usually 24 to 48 hours for light moisture, but longer after saturation. Check with a moisture meter first; if it still reads high, you shouldn’t paint yet.
Can Wet Drywall Be Saved Without Replacement?
Yes, sometimes you can save wet drywall—if you dry it fast, it isn’t crumbling, and mold hasn’t started. But if it’s saturated or soft, you’ll need replacement to protect your space and yours.
Does Homeowners Insurance Cover Drywall Water Damage?
Usually, your homeowners insurance covers drywall water damage if a sudden, accidental event caused it, like a burst pipe. It often won’t cover gradual leaks, so you’ll want to document damage and review your policy.
How Can I Tell if Hidden Mold Is Present?
You can suspect hidden mold if you smell mustiness, see staining, notice swelling, or feel soft drywall; use a moisture meter and inspect behind surfaces. If symptoms persist, you should call a certified mold assessor.
When Should I Call a Water Damage Restoration Professional?
Call a water damage restoration professional when drywall stays saturated, you smell musty odors, spot mold, or see swelling. Even a little leak can hide damage; you’ll protect your space, standards, and crew.
Conclusion
When you see water-stained drywall, you’re reading a warning sign, not just a blemish. You should cut out softened sections, dry the cavity, and replace any material that stayed wet too long. Think of the wall as a shield: once it’s breached, you need to restore every layer. By fixing leaks, improving ventilation, and inspecting regularly, you’ll protect your structure from mold, rot, and repeat damage, keeping your property sound and resilient.