
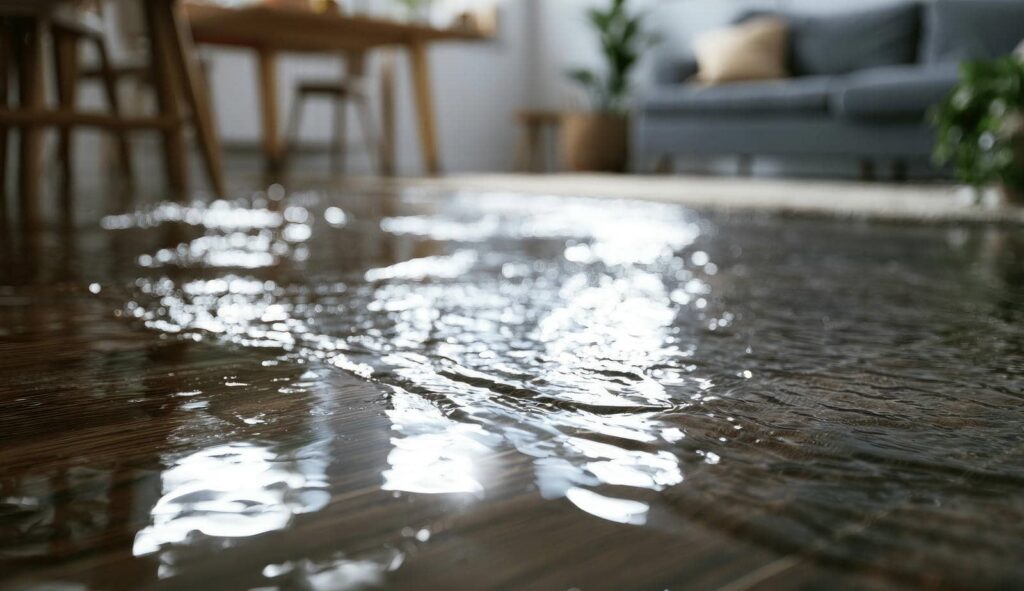
If you discover water damage just as a storm rolls in, it’s no coincidence that the clock starts working against you. You need to act fast, limit the spread, and document everything before hidden moisture turns a repair into a larger loss. In the next steps, you’ll see what to do first, how water damage restoration works, and where mistakes can quietly make the damage worse.
Key Takeaways
- Shut off the water and electricity source safely, document damage with photos, and move valuables to a dry area.
- Call a professional quickly to assess damage, extract standing water, and begin drying and repairs.
- Use proper drying methods like air movement, dehumidification, and moisture monitoring to prevent hidden mold and structural damage.
- Watch for signs of severe or hidden damage, including sagging floors, swollen walls, bubbling paint, and electrical or sewage contamination.
- Review insurance coverage, get a written estimate, and prevent future losses by inspecting pipes, drains, gutters, and leak alarms regularly.
What to Do Immediately After Water Damage
If it’s safe to do so, start by stopping the source of water and shutting off electricity to affected areas.
Then, document the damage with clear photos and brief notes for your records and insurance claim.
Move valuables, papers, and electronics to a dry space, and wear protective gear if you must enter wet rooms.
Contact a trusted water damage restoration professional quickly so you can assess the scope, identify hidden moisture, and begin a proper recovery plan.
You’re not handling this alone; quick, informed action helps protect your home and health.
Open windows only if conditions are dry and safe, and keep family members and pets away from contaminated water.
Prioritize calm, organized steps now, and you’ll make the next phase easier.
How to Stop Further Damage
Next, focus on containing the water and limiting spread: place towels, mops, or a wet/dry vacuum around active seepage, and use buckets or pans to catch drips. You can slow damage fast when you act methodically and stay calm.
Shut off the source if you can reach it safely.
Move furniture, rugs, and electronics out of the wet zone.
Lift curtains and nearby textiles so they don’t wick moisture.
Block doorways with absorbent barriers to protect adjacent rooms.
Keep traffic low so you don’t track water through the property. If floors feel unstable, stay out and wait for help.
Your goal is simple: stop migration, protect clean areas, and keep your space manageable until restoration begins.
What Water Damage Restoration Includes
Water damage restoration starts with a detailed damage assessment so you can identify affected materials, hidden moisture, and safety risks.
Next, technicians perform water extraction to remove standing water quickly and reduce ongoing damage.
After that, they dry the structure and complete needed repairs so your property can return to safe, usable condition.
Damage Assessment
After the water intrusion is controlled, a thorough damage assessment identifies how far moisture has spread, which materials are affected, and what repairs your property needs.
You’ll get a clear picture of structural, cosmetic, and hidden damage so your restoration team can act with confidence. This step helps you join the right plan for your home and avoid missed issues that could grow later.
During inspection, pros document findings and guide next steps.
- Check walls, floors, and ceilings.
- Test damp materials and framing.
- Map affected rooms and pathways.
- Prioritize repairs by risk and urgency.
When you understand the scope, you can move forward knowing your property’s recovery is organized, measurable, and built around your needs.
Water Extraction
Rapid water extraction removes standing water before it can soak deeper into building materials and spread damage. You’ll usually see technicians bring in truck-mounted pumps, submersible pumps, and weighted extractors to pull water from carpets, pad, hard floors, and crawl spaces.
They’ll work room by room, tracing where water has traveled so they don’t miss hidden pockets under furniture or along baseboards. This step matters because faster removal limits staining, warping, and microbial growth.
You can expect the team to protect unaffected areas, move contents as needed, and monitor moisture levels while they work. If you’re dealing with a leak or flood, you’re not handling it alone; extraction is the first big step toward regaining control and getting your property back to normal.
Drying And Repairs
Once the standing water is gone, the focus shifts to drying out hidden moisture and repairing the damage before it spreads further. You’ll want professionals to target walls, subfloors, insulation, and trim with air movers, dehumidifiers, and moisture meters. This step protects your home and helps your household feel secure again.
Inspect concealed cavities for trapped water.
Remove saturated materials that can’t dry safely.
Sanitize affected surfaces to limit contamination.
Rebuild damaged finishes so your space feels whole.
You’ll see technicians monitor humidity and adjust equipment until readings return to safe levels. Then they’ll complete repairs, from drywall patches to flooring replacement, so you can move back into a clean, stable environment with confidence and peace of mind.
How to Dry Walls, Floors, and Contents
You’ll dry walls by removing wet insulation, opening cavities when needed, and using air movement and dehumidification to pull moisture out of the structure.
Protect floors by extracting standing water quickly, lifting wet materials if possible, and keeping surface moisture under control to prevent warping or delamination.
For contents, sort items by material, clean and dry salvageable pieces promptly, and monitor moisture levels until everything reaches a stable condition.
Drying Walls Effectively
Drying walls effectively starts with removing as much moisture as possible from the structure and the room air, because trapped water can lead to swelling, staining, and mold growth.
You can help the process by creating steady airflow and monitoring humidity so the wall cavity dries evenly. Use these steps:
- Remove baseboard trim if needed to open lower wall areas.
- Run fans across the wall surface, not straight into soaked materials.
- Dehumidify the room to pull moisture from the air.
- Check the wall for cool spots or lingering dampness.
Stay patient; normal-looking walls can still hold water behind the surface.
If you notice soft drywall, persistent odors, or rising moisture readings, bring in a qualified restoration team. You’re not dealing with this alone, and a careful drying plan can protect your home and peace of mind.
Protecting Floors And Contents
While walls dry, you should also protect floors and contents from secondary damage. Lift rugs, furniture, and electronics onto blocks or clean plastic crates so air can move underneath.
Wipe hard surfaces with a damp cloth, then dry them with fans and dehumidifiers positioned to create crossflow. If you have hardwood, keep it slightly cool and monitored; too much heat can cause cupping or cracking.
For carpet, extract standing water quickly and place air movers at the surface edge. Remove wet textiles, papers, and photos, and spread them out in a dry room.
Label salvaged items so you can track what’s safe, what needs cleaning, and what needs disposal. You’re not handling this alone; careful drying now helps your home recover faster.
How to Clean and Disinfect Damaged Areas
Start by cleaning hard surfaces with warm water and a mild detergent to remove dirt, silt, and residue left by the water event. Rinse with clean water, then dry each surface thoroughly so moisture can’t linger and support microbial growth. Use disposable cloths or mop heads, and change them often to avoid spreading contamination.
Clean first, disinfect second.
Apply an EPA-registered disinfectant exactly as labeled.
Keep the surface wet for the full contact time.
Ventilate the area and let it dry completely.
For porous materials, follow manufacturer guidance before you reuse them. Wash your hands after each task, and bag any debris you remove.
You’re not alone here; these steps help you restore a safer, healthier space with confidence.
When to Call a Water Damage Pro
You should call a water damage pro when you see severe damage signs like warped materials, saturated drywall, or standing water that won’t clear quickly.
Even if surfaces look dry, hidden moisture can stay inside walls, under flooring, or in insulation and cause mold or structural decay.
A trained pro can inspect, dry, and verify conditions so you don’t miss damage that’s still developing.
Severe Damage Signs
Some water damage situations call for professional restoration right away, especially when the problem involves extensive flooding, sewage contamination, soaked drywall or insulation, structural weakening, or water that’s been sitting for more than 24 to 48 hours.
You’re not overreacting; you’re protecting your property and the people in it. Call a pro when you notice:
- Floors that sag, shift, or feel unstable
- Walls, ceilings, or baseboards that swell, crumble, or bow
- Electrical hazards, including wet outlets or breaker issues
- Contaminated water from toilets, drains, or storm runoff
These signs mean the damage has moved beyond routine cleanup. A trained crew can assess conditions, stop further loss, and start safe drying and removal.
When you act early, you join other smart owners who choose control over guesswork.
Hidden Moisture Risks
Even when visible damage looks minor, hidden moisture can keep spreading behind walls, under floors, and inside insulation. You may not see it, but sensors and thermal imaging often reveal damp materials that trap water and invite mold, warping, and odors.
If your drywall stays cool, baseboards swell, paint bubbles, or floors feel soft, you shouldn’t wait. Call a water damage pro when leaks involve electrical systems, sewage, structural framing, or areas larger than a room.
Professionals dry materials with targeted airflow, dehumidification, and moisture mapping, so you can protect your home and your people. Acting early keeps repair costs down and helps your household get back to normal with confidence and support.
Restoration Costs and Insurance Coverage
How much will water damage restoration cost, and what’ll insurance cover? You’ll usually pay based on the water source, affected materials, and drying time, so every job’s scope differs.
Insurance often helps when the loss is sudden and accidental, but coverage depends on your policy, deductible, and exclusions. You’re not alone in sorting this out.
- Ask for a written estimate.
- Document damage with photos.
- Review your deductible and limits.
- Confirm coverage before work starts.
A clear claim file helps you recover faster and avoid surprises.
Reputable restorers can explain line items, coordinate with adjusters, and separate covered repairs from upgrades. When you understand costs early, you can make confident decisions and protect your property.
Common Mistakes That Make Damage Worse
After water damage, the wrong move can spread moisture, increase structural damage, and raise restoration costs. Don’t delay extraction; standing water soaks subfloors, drywall, and insulation fast.
Avoid using box fans alone, since they can push humid air into hidden cavities. Never power on wet outlets, appliances, or HVAC components; you could create a shock hazard and move contaminated moisture through the system.
Don’t tear out materials blindly, either. You may disturb load-bearing assemblies or miss trapped water behind baseboards and trim.
Skip harsh cleaners on porous surfaces unless a pro recommends them; they can set stains and leave residues. If you smell mustiness or see swelling, call a qualified restoration team. You’re not overreacting—you’re protecting your home and your people.
How to Prevent Future Water Damage
To reduce the risk of future water damage, start with regular inspections and simple maintenance that catch problems early. You can protect your home and feel confident in your space by making prevention part of your routine. Focus on the most failure-prone areas and act before small leaks spread.
Check supply lines, hoses, and shutoff valves for corrosion or bulges.
Clean gutters, downspouts, and drains so water moves away from the foundation.
Seal gaps around windows, doors, and pipe penetrations.
Test sump pumps, backflow devices, and leak alarms monthly.
Keep indoor humidity controlled, and watch for stains, warped materials, or musty odors. If you spot a change, investigate quickly.
Consistent attention helps you stay ahead of damage and keeps your property safer.
How to Choose a Restoration Company
When water damage hits, you’ll want a restoration company that responds quickly, documents the damage, and has the right equipment and certifications for the job.
Check for 24/7 availability, IICRC-trained technicians, and clear moisture mapping, extraction, drying, and mold-prevention steps.
Ask for a written scope, timeline, and itemized estimate so you know what’s covered. You should also verify licensing, insurance, and references from property owners like you.
A dependable team will explain drying goals, monitor humidity, and communicate each day until your space feels safe again.
Choose a company that listens, answers questions honestly, and treats your home or business like part of the community.
When you work with the right crew, you’re not handling this alone; you’re getting experienced support and a clear path back to normal.
Conclusion
You’ve seen that fast action usually limits losses, and the theory that “drying alone fixes everything” is often false. Hidden moisture can remain in wall cavities, under flooring, and inside contents, leading to mold and structural decay if you don’t address it. By stopping the source, documenting damage, and using proper extraction, drying, and disinfection, you’ll protect your property and speed recovery. When in doubt, call a qualified restoration company.