
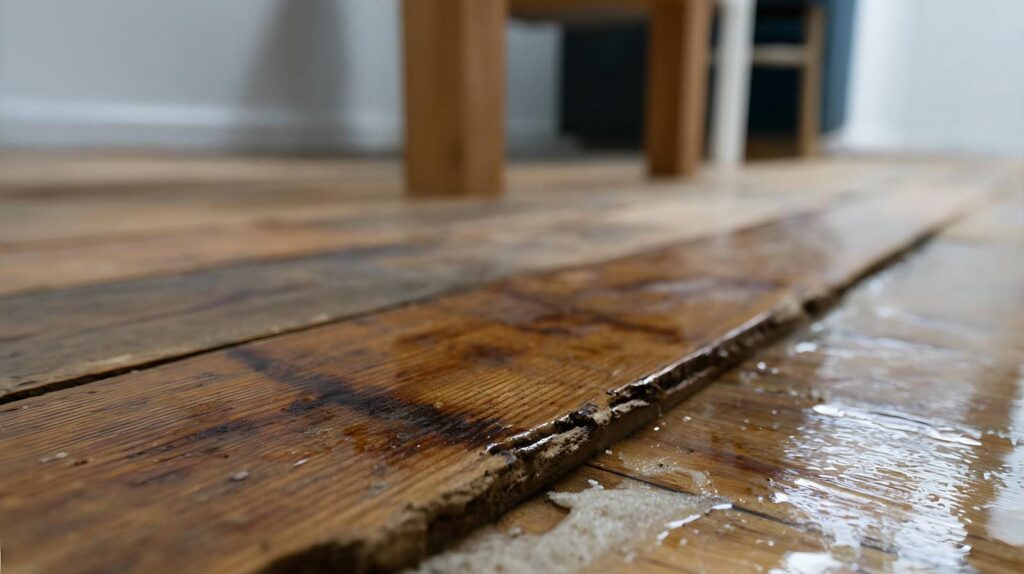
You might think water damage just needs a quick cleanup, but you need a controlled process to stop hidden damage. First, you inspect the source and spread, then extract standing water with pumps. Next, you use air movers and dehumidifiers to dry materials to safe moisture levels. After that, you clean with antimicrobial agents and check for mold risk. The exact order and timing can change from one room to the next when learning how water damage restoration works.
Key Takeaways
- A full inspection identifies the water source, visible damage, and hidden moisture using meters and thermal imaging.
- Standing water is removed quickly with pumps and vacuums based on the depth and spread of flooding.
- Drying starts immediately with air movers and dehumidifiers to pull moisture from materials and the air.
- Surfaces are cleaned with approved antimicrobial products to remove contaminants, odors, and help prevent mold growth.
- Damaged materials are documented, repaired, or replaced, while moisture levels are monitored until the area is fully dry.
What Water Damage Restoration Includes
Water damage restoration includes a step-by-step process that starts with a full inspection of the affected area to identify the source of the damage and assess its extent.
You’ll then move into extraction, where you remove standing water with pumps and vacuums to prevent further saturation.
Next, you’ll begin drying with dehumidifiers and air movers to lower moisture in floors, walls, and contents.
Cleaning follows, using antimicrobial agents to treat contaminated surfaces and reduce odor.
Then you’ll repair or replace damaged materials so your space feels safe and complete again.
This is how water damage restoration works when you need a structured response after leaks, floods, or storm damage.
You’re not handling it alone; you’re restoring order with a proven process.
What Happens During Inspection
During inspection, you’ll assess visible damage to walls, floors, ceilings, and contents to determine the extent of the loss.
You’ll also use moisture meters and thermal imaging to detect hidden moisture behind surfaces and in structural materials.
This step guides the restoration plan by identifying affected areas that need drying, cleaning, or repair.
Damage Assessment
An inspector first documents the visible impact of the leak, flood, or storm, then traces the source and spread of moisture through walls, floors, ceilings, and contents.
You’ll see them classify materials as salvageable, repairable, or unsalvageable, which helps you understand what stays in place and what gets removed.
They record staining, warping, swelling, delamination, corrosion, and microbial concerns, then map affected rooms and adjacent areas so your crew can prioritize the right work.
They also note safety risks, structural compromise, and contamination level, giving you a clear picture of what the loss means.
This assessment becomes the working plan for extraction, drying, cleaning, and repairs, so your restoration team can move together with purpose and confidence.
Moisture Detection
Because moisture often hides behind finishes and inside assemblies, the inspector uses specialized tools to locate what the eye can’t see. You’ll see a moisture meter, infrared camera, and sometimes a hygrometer working together to map affected areas.
The technician checks drywall, trim, subfloors, insulation, and baseplates, comparing readings against dry standards and nearby unaffected materials. They probe around leaks, flood lines, and ceiling stains, then trace the spread to determine how far water traveled.
If readings spike, the team marks zones for extraction and drying. This process helps you stay informed, protects your home’s structure, and keeps the restoration plan aligned with your space.
Clear detection also reduces guesswork, so your team can act fast and restore confidence.
How Standing Water Is Removed
You first assess the water depth so you can choose the right extraction equipment and set the removal sequence.
Next, you use pump extraction methods to remove bulk standing water quickly from floors, cavities, and low-lying areas.
After pumping, you vacuum residual moisture from surfaces and seams to reduce saturation and prepare the area for drying.
Assess Water Depth
Before extraction begins, the technician measures water depth across the affected area to determine how much standing water’s present and what removal method will work best.
You’ll see the team map low spots, check depth at walls, doorways, and seams, and note where water’s pooled under furniture or baseboards. They use a moisture meter, marked probe, or visual reference to classify shallow, moderate, or deep accumulation.
This assessment helps you understand where flooring, padding, or insulation has absorbed water and where containment is needed. The technician records measurements, identifies safety risks, and confirms whether the surface can support foot traffic.
Pump Extraction Methods
Once the technician has measured the standing water, pump extraction begins to remove it quickly and in a controlled way.
You’ll see submersible or inline pumps placed at the deepest points, then discharge hoses routed to safe drainage areas. The crew starts with a test flow, checks capacity, and adjusts intake position to keep suction steady.
If the water has debris, they use screened intakes or strainers to prevent clogs and protect equipment. In larger rooms, they may stage multiple pumps so you’re not waiting on one unit to finish.
They monitor progress continuously, watching for hidden pockets behind furniture or under partitions. This method gets your property cleared fast, lowers damage spread, and sets your team up for drying and cleanup.
Vacuum Residual Moisture
After pump extraction, technicians use a wet vacuum to remove the thin film of residual moisture that standard pumps can’t capture. You’ll see them work edge to edge, starting at low spots and seams, where water hides under baseboards and along tile grout.
They’ll place the wand flat, maintain steady suction, and empty the recovery tank before it overfills. This step helps you protect subfloors and speed drying.
- Check moisture maps before vacuuming
- Seal off unaffected areas
- Lift water from carpet backing
- Reinspect with a hygrometer
When you’re part of the restoration process, this precise cleanup matters. It reduces wicking, limits microbial growth, and prepares your space for air movers and dehumidifiers.
How the Drying Process Works
Drying starts as soon as the affected area has been inspected and excess water has been extracted, because moisture left in walls, floors, and structural materials can continue to spread and cause secondary damage.
You’ll position air movers to push fast, warm air across damp surfaces, and you’ll place dehumidifiers to pull vapor from the air.
You’ll monitor hidden moisture in cavities, trim, and subfloors with meters, then adjust equipment until readings drop to safe levels.
Keep pathways clear so airflow reaches every wet zone. Seal the area when possible to keep humid outdoor air out and improve efficiency.
Throughout the process, you’re part of a controlled system that protects the structure, limits swelling, and helps your space return to a stable, dry condition.
How Restoration Cleaning Works
When moisture levels are under control, restoration cleaning removes the contamination, residue, and odors left behind by water intrusion. You’ll sort materials, confirm salvageable surfaces, and choose the right detergents or disinfectants for each area.
Technicians work methodically so you’re not left guessing what happens next.
- Vacuum loose debris and sediment
- Wipe structural surfaces with approved cleaners
- Treat fabrics, contents, and hard goods
- Rinse, detail, and verify finish quality
You’ll see crews agitate soil, capture wastewater, and repeat passes until surfaces meet restoration standards. They’ll also neutralize lingering smells with targeted deodorization, then document what’s cleaned for your records.
This step helps your space feel orderly again, and it gives you confidence that the cleanup team’s handled the details with care.
How to Prevent Mold During Drying
To prevent mold during drying, you need to lower moisture fast and keep it from lingering in hidden materials. Start by removing standing water, then position air movers to push air across wet surfaces, not directly at one spot.
Run dehumidifiers continuously to pull vapor from the air and from porous materials like drywall, trim, and subflooring. Open cavities, lift baseboards, and remove saturated padding so trapped moisture can escape.
Check humidity and surface readings with a meter, and adjust equipment when values stall. Inspect corners, wall bottoms, and behind furniture because mold often starts there.
If you stay methodical, you protect your home, support your crew, and keep the drying zone safe, clean, and ready for the next restoration step.
How Long Each Restoration Step Takes
Restoration timelines vary by damage severity, material type, and drying conditions, but you can usually expect the process to move in stages rather than all at once.
You’ll often see:
- Inspection and moisture mapping: 30 minutes to 2 hours
- Water extraction: 1 to 6 hours
- Drying and dehumidification: 3 to 7 days
- Cleaning and repairs: 1 day to several weeks
You should track daily moisture readings, because framing, drywall, and flooring dry at different rates.
If you join the process early, you can reduce secondary damage and keep your crew aligned on next steps.
You’ll know the job’s moving correctly when humidity drops, surfaces feel stable, and equipment gets repositioned for remaining wet spots.
Wrap-Up
So, after all that excitement, you get to discover that water damage restoration is basically a race against time with a lot of fans, pumps, and dehumidifiers. First, you inspect the damage, then remove standing water, dry everything thoroughly, clean with antimicrobial products, and finally make repairs. You keep monitoring moisture the whole way, because apparently, water likes to hide. If you follow each step carefully, you’ll restore the space safely and help prevent mold.