
When a ceiling leak starts after a roof or plumbing failure, you need to act fast to limit damage and reduce the risk of collapse. Emergency ceiling leak cleanup should begin by shutting off water or power if needed, catching drips with buckets, and protecting the floor with tarps. Check for sagging drywall or cracks before moving underneath the affected area. Drying, stain control, and repair come next, but the first few minutes can determine how much of the room can be saved.
Key Takeaways
- Stop the leak at the source, shut off nearby power, and keep everyone away from sagging ceilings.
- Place buckets or tarps under the drip to contain water and prevent floor damage.
- Move furniture and valuables out of the area, and cover anything that remains.
- Inspect for collapse risk, soft drywall, and hidden moisture, then call a professional if damage is worsening.
- Remove damaged materials, dry the cavity, and repair with new drywall and proper finishing.
Stop the Leak and Stay Safe
Before you clean up anything, stop the leak at its source and make the area safe.
If a roof failure caused the drip, shut down the affected section or move valuables away; if plumbing is involved, close the nearest supply valve.
Turn off power to any wet ceiling fixture or room circuit if water may contact wiring.
Don’t stand under a sagging ceiling, and keep others out until the area feels stable.
Check for active dripping, bulging drywall, or spreading stains, because those signs show moisture may be trapped above the surface.
Use emergency ceiling leak cleanup procedures only after the source is controlled.
If the leak continues, call a qualified roofer, plumber, or emergency service so you can protect your space and your people.
Contain Ceiling Leak Water
Place a bucket directly under the active drip to capture water and reduce floor damage.
If the ceiling is spreading moisture, secure a tarp or plastic sheeting beneath the leak path to direct runoff into the bucket.
Check both controls often and reposition them as the leak shifts.
Bucket Placement
Set a bucket directly under the drip point to contain ceiling leak water and prevent further damage to the floor. Center it beneath the active leak so falling water lands cleanly inside, not on trim or wiring.
If the stream shifts, adjust the bucket fast and keep the opening aligned with the lowest point. Use a sturdy container with enough capacity to handle steady dripping without overflow. Check the fill level often and empty it before it reaches the rim.
Place a towel or rubber pad under the bucket to reduce slipping and noise. If the ceiling sags, stay clear of the area and monitor from a safe distance.
You’re handling the first line of defense here, and careful placement helps protect your space together.
Tarp Coverage
A tarp gives you a wider catch area when ceiling leak water starts spreading beyond a bucket. Place a clean plastic tarp under the active drip zone and extend it several feet past the wet footprint.
If you can, slope the tarp toward the bucket so runoff channels in one direction. Secure the edges with painter’s tape, clamps, or weighted objects so the sheet won’t shift when water hits it.
Keep the tarp clear of electrical fixtures and walking paths. If the ceiling is sagging, don’t press on it; let the tarp manage the surface water while you monitor for new drips.
This setup helps your household stay organized, reduces slip risk, and keeps the cleanup team working together with a clear, shared plan.
Inspect Sagging Drywall for Collapse Risk
When drywall is sagging, check for a collapse risk before you move underneath it or begin cleanup.
Look for bowing, long cracks, separation at seams, and any soft or swollen areas that flex when you press lightly on nearby framing, not the damaged panel itself.
If you hear creaking, see bulging, or notice fasteners pulling free, treat the section as unstable. Stay out from below the lowest point and keep your path clear in case material drops.
Use a flashlight from a safe angle to inspect edges and moisture stains. You’re protecting everyone in the room by confirming whether the ceiling can still carry its own weight.
If the sag grows quickly, stop work and get help from a qualified professional immediately.
Protect the Room During a Ceiling Leak
Move furniture, electronics, and loose valuables out of the leak zone, and cover anything you can’t relocate with plastic sheeting or waterproof tarps.
Shut off power to nearby outlets, switches, and fixtures at the breaker if water could reach them.
Place buckets, pans, or shallow containers directly under active drips to catch runoff and reduce floor damage.
Lay absorbent towels around the perimeter to control splashes and protect baseboards.
If your ceiling has a bulge, keep people clear of that area and mark it so everyone in your home knows to avoid it.
Open interior doors for safe access, but don’t disturb wet drywall.
Keep the room organized and calm so your household stays protected while you wait for repairs and next steps.
Dry the Ceiling Leak Area Fast
Start drying the ceiling leak area immediately to limit staining, mold growth, and further drywall failure.
You’ll work faster when you clear the room, open windows, and run fans to move humid air out. Aim airflow across the wet surface, not straight at loose drywall, so you don’t worsen sagging.
- Wipe visible drips with clean towels.
- Place a dehumidifier near the wet zone.
- Remove damp insulation only if it’s accessible.
- Check the ceiling twice daily for new moisture.
Keep the surface exposed so evaporation continues, and replace saturated towels often.
If you’re part of a shared household, let everyone know the area stays off-limits until it feels dry and firm.
When to Call a Plumber or Roofer
If you see active dripping, spreading stains, or moisture above the ceiling, call a plumber or roofer right away.
You shouldn’t wait for the leak to stop on its own, because hidden water can keep entering the assembly.
If the drywall sags, softens, or cracks, treat it as a structural damage risk and get a professional inspection immediately.
Active Leak Signs
When water is actively dripping, the ceiling is sagging, or stains are spreading, you need to treat the leak as urgent and call a plumber or roofer right away. You’re not overreacting; you’re protecting your space and the people in it.
Watch for these active leak signs:
- Fresh water drops form and fall continuously.
- The ceiling surface feels soft, wet, or cool.
- Discoloration expands during or after rainfall.
- You hear dripping inside walls or above the ceiling.
If you see any of these, shut off nearby water if you can, and keep clear of the area.
Then contact a licensed pro immediately. Acting fast helps your home stay safer, and it keeps your cleanup team working from a controlled, manageable leak.
Structural Damage Risks
Even a small ceiling leak can turn into structural damage quickly, so you need to call a plumber or roofer as soon as you see sagging drywall, persistent stains, bulging paint, or wet insulation.
Water weakens gypsum, corrodes fasteners, and can spread into joists, trusses, and electrical cavities. If the ceiling feels soft, bows, or cracks widen, stop cleanup and protect the area. You’re not just dealing with staining; you’re preventing collapse, mold growth, and hidden rot.
A plumber should inspect supply lines, drains, and fixtures. A roofer should check shingles, flashing, underlayment, and attic penetrations.
If water keeps returning after drying, you need a pro now. Acting early helps your home stay safe, stable, and part of a well-prepared community.
Handle Stains and Mold Risk
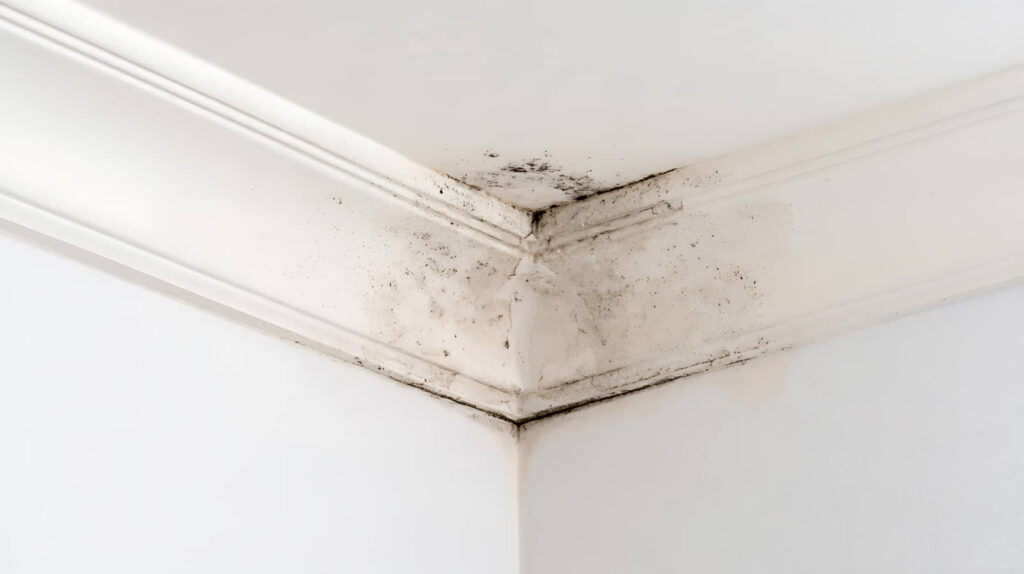
Stains on a ceiling usually signal ongoing moisture intrusion, so you should treat them as evidence of a leak rather than a cosmetic issue. You’ll protect your space by documenting discoloration, checking for soft or swollen drywall, and watching for musty odor that can indicate hidden mold growth.
Keep the area dry and ventilated so spores don’t spread. If the stain keeps expanding, assume the source is still active.
- Photograph the stain before you disturb it.
- Mark the edges to track growth.
- Use gloves and an N95 if you inspect nearby material.
- Remove wet contents below the leak promptly.
You’re part of the team when you act quickly and consistently, because early control reduces contamination and helps everyone stay safer.
Repair Ceiling Damage After Cleanup
Once the leak stops and the area dries, you can begin repairing the ceiling by cutting away damaged drywall, checking the framing for moisture, and replacing any material that’s soft, swollen, or moldy.
Use a utility knife or drywall saw to make clean cuts back to solid edges, then remove loose insulation and debris. If the joists feel damp, let them dry completely before you close the cavity.
Install new drywall of the same thickness, secure it to sound framing, and tape the joints with paper or mesh tape.
Apply joint compound in thin coats, sanding between passes. Prime the patch before you paint so the finish matches the surrounding ceiling and your space feels whole again.
Prevent Future Ceiling Leaks
After you patch the ceiling, focus on what caused the leak so it doesn’t return. Inspect the roof, plumbing, and attic space together, because one weak point can wet the same area again. You’re not fixing a patch; you’re protecting your home and the people who live in it.
- Check shingles, flashing, and gutters after storms.
- Test supply lines, drain joints, and valves for seepage.
- Seal attic penetrations around vents, chimneys, and wiring.
- Monitor stained drywall for new moisture after each rain or fixture use.
Keep a maintenance log, photograph problem areas, and schedule repairs before minor damage spreads.
When you stay proactive, you keep your space safer, drier, and ready for everyone who depends on it.
Frequently Asked Questions
How Do I Know if the Leak Is From Plumbing or the Roof?
Check patterns: plumbing leaks usually drip when fixtures run, while roof leaks worsen during rain. Inspect stains near pipes, attic moisture, and ceiling sagging. If you’re unsure, shut water off and call a professional.
Can I Use a Fan Immediately After a Ceiling Leak?
Yes, you can use a fan right away, but you should first stop the leak and assess for sagging drywall. Aim airflow at damp surfaces, keep electricity off nearby, and monitor moisture above the ceiling.
How Long Should I Wait Before Repainting Repaired Ceiling Areas?
Wait until you’ve fully dried, patched, and primed the ceiling, usually 24–72 hours, then repaint. You’ll get better adhesion and fewer defects if moisture’s gone and the surface feels firm.
Will Homeowners Insurance Cover Emergency Ceiling Leak Cleanup Costs?
Yes, your homeowners insurance may cover it if the leak’s sudden and accidental. Check your policy, document damage, and call your insurer fast. Like a ticking clock, delays can weaken your claim.
What Signs Mean Hidden Water Damage Is Still Present?
You’ll notice hidden water damage if stains spread, paint blisters, drywall sags, odors persist, or floors feel soft. Check for active dripping, warped trim, rusted fasteners, and elevated moisture readings above ceilings.
Summary
When the drip finally slows, don’t relax yet. You’ve stopped the source, contained the water, and protected the room, but the ceiling may still be hiding damage. Keep watching for sagging, staining, or mold, and dry every surface fast. If the leak came from plumbing or roofing, call a pro before the next failure starts. Your cleanup isn’t finished until the structure’s stable, the area’s dry, and the repair’s complete.