
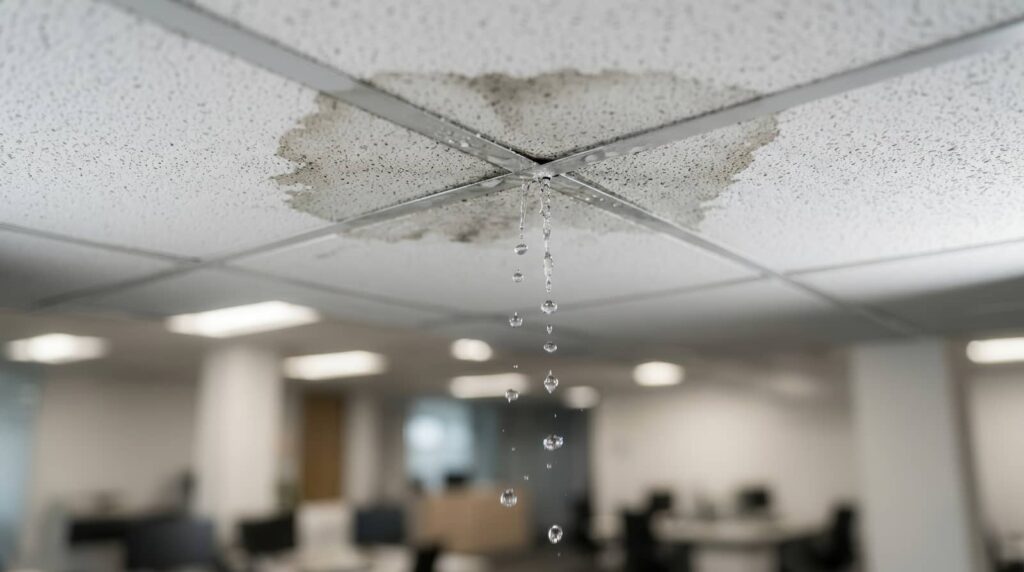
Commercial storm damage repair requires quick action to prevent minor issues from becoming major losses after a severe storm. Like a battle scar left behind, storm damage can continue to spread if you don’t respond quickly. The first steps include securing the property, stopping active leaks, and inspecting the roof, flashing, drainage systems, and interior areas for signs of water intrusion. From temporary repairs and emergency tarping to detailed claim documentation, every step plays an important role in the recovery process. The key is identifying hidden damage early before it leads to more extensive and costly repairs.
Key Takeaways
- Secure the building immediately, shut off unsafe utilities, and restrict access to trained staff only.
- Tarp exposed roof areas, board broken openings, and remove standing water to prevent further wind and rain damage.
- Inspect roofs, flashing, membranes, windows, siding, and interiors for leaks, staining, moisture, and structural hazards.
- Document all damage and emergency repairs with photos, notes, and timestamps for insurance claims.
- Repair leaks, dry hidden cavities, verify drainage, and improve storm resilience with regular inspections and stronger drainage systems.
What Counts as Commercial Storm Damage
Commercial storm damage includes the kinds of impact that can interrupt normal business operations after severe weather. You’ll often see it as wind-torn roofing, broken flashing, water intrusion, shattered windows, dented siding, debris strikes, and flooding around entries or equipment.
You may also notice hidden issues, like soaked insulation, compromised membranes, or electrical exposure after rain and hail. If your building takes a hit, commercial storm damage repair should focus on documenting visible and concealed damage so you can act with your team, not guess alone.
You’re not dealing with cosmetic wear; you’re handling structural and operational risk that can spread fast. When you recognize these signs early, you can protect your property, support your staff, and stay connected to a business community that knows recovery takes clear, coordinated action.
Stop Further Damage After the Storm
Once the storm passes, you need to act fast to stop damage from spreading. Secure the site, shut off unsafe utilities, and limit entry to trained staff.
If you can do so safely, place tarps over exposed roof sections, board broken openings, and move sensitive inventory away from moisture paths. Use buckets or drains to collect active drips, and remove standing water to reduce slip hazards and secondary deterioration.
Document emergency measures with photos and notes so your repair team can act efficiently. Keep your crew informed through clear internal updates, and assign one point of contact to coordinate next steps.
Fast containment protects your property, reduces downtime, and helps your team stay aligned while you prepare for full commercial storm damage repair.
Check Roof, Wind, and Water Damage
Inspect the roof, exterior, and interior for storm-related damage as soon as it’s safe to do so. You should check membranes, flashing, seams, drains, skylights, and rooftop equipment for displacement, punctures, or impact marks.
On the exterior, look for bent metal, loose panels, damaged gutters, and debris strikes. Inside, scan ceilings, walls, insulation, and floors for staining, sagging, or dampness that signals water intrusion.
Document every issue with photos, notes, and timestamps so you can brief your facility team or contractor with confidence. If you spot wind uplift, standing water, or active staining, treat the area as compromised and restrict access.
Thorough inspection helps you protect your building, support repairs, and keep your team aligned after the storm.
Fix Commercial Roof Leaks First
If water is getting in, you need to stop the roof leak first so damage doesn’t spread into insulation, structure, and interior finishes.
You should isolate the source fast, then inspect seams, flashings, penetrations, drains, and punctures. Use temporary patches, sealant, or membrane-compatible repair materials to control active entry points until permanent work starts.
If wind lifted edges or damaged coping, secure those areas immediately. Keep traffic off the wet section so you don’t worsen the opening.
Document the location, size, and cause of each leak for your repair team and insurer.
When you act quickly, you protect your building, your schedule, and your crew. Your team can stay focused, stay safe, and get back to work with confidence.
Dry Out Interior Water Damage
Dry out interior water damage as soon as you’ve stopped the source so moisture doesn’t keep spreading through drywall, insulation, flooring, and framing.
You should document affected areas, then remove standing water with pumps, wet vacs, and absorbent tools.
Set air movers to create crossflow, and run dehumidifiers to pull vapor from the space.
Open access panels and remove saturated materials that can’t dry within 24 to 48 hours.
Check hidden cavities, baseplates, and underlayment with a moisture meter, not guesswork.
Keep HVAC controls isolated until you confirm clean, dry conditions.
You and your team stay safer when you track readings, maintain airflow, and verify progress daily.
Fast, methodical drying protects your building and helps your crew get back to normal together.
Repair Exterior Damage and Openings
Once interior drying is underway, shift to the building envelope and close up any breaches that let the storm get in. You’ll inspect siding, masonry, flashing, windows, doors, louvers, and roof edges for impact, wind lift, and displaced seals.
Remove loose material, then reinstall or replace damaged panels, trim, and fasteners so the system can shed water again. Reseal joints with compatible sealant, and reset penetrations, curbs, and frames to restore a tight envelope.
If openings can’t be fixed right away, you should install temporary board-up, shrink wrap, or weatherproof barriers to block rain, dust, and pests.
Work methodically, document each repair point, and verify that drains, gutters, and scuppers aren’t backing water into repaired areas.
File and Manage Commercial Storm Claims
As you move from emergency stabilization to recovery, file your commercial storm claim quickly and back it with clear evidence. You’ll help your team stay in control when you document losses, track dates, and coordinate with your adjuster.
Keep every photo, invoice, inspection note, and temporary repair record in one file. Use this checklist:
- Capture dated images of damage, water paths, and failed materials.
- Save receipts for tarping, cleanup, and emergency labor.
- Log claim numbers, contacts, and every call summary.
- Review settlement offers against your documented scope.
You don’t have to manage this alone; your facility team and contractor can support the file.
Stay precise, respond fast, and ask for written confirmation on every decision. That discipline protects cash flow and keeps your operation moving.
Prevent Future Commercial Storm Damage
You should inspect your roof regularly to catch loose membranes, failed seals, and impact damage before a storm worsens them.
You can also upgrade drainage systems to move water off the roof faster and reduce ponding, leaks, and overflow.
These controls help you lower repair costs and improve storm resilience over time.
Regular Roof Inspections
Regular roof inspections help you catch minor issues before they turn into costly storm damage, especially after heavy wind, rain, or debris exposure. You protect your team, reduce disruption, and keep your building ready for the next storm.
Check these areas on a schedule:
- Membrane seams for splits or lifting
- Flashings around penetrations and edges
- Surface wear, punctures, or blistering
- Interior signs like stains, damp insulation, or odors
When you spot damage early, you can act fast and avoid panic later. You also build confidence across your facility because everyone knows the roof’s being watched.
Use a documented checklist, take photos, and compare each inspection to the last one. That simple routine helps you stay ahead of leaks and keep your operations stable.
Upgrade Drainage Systems
After inspections, take a hard look at how water leaves the roof and site. You can reduce repeat storm damage by upgrading gutters, downspouts, scuppers, drains, and sump pumps so they move water fast and reliably.
Size each component for local rainfall, roof area, and overflow paths. Clear debris screens, add leaf guards, and slope low spots toward drains to stop ponding. Seal connections, replace corroded fittings, and verify discharge points move water away from walls, doors, and foundations.
If your team works together on routine checks, you’ll catch blockages before they become leaks. A well-tuned drainage system protects insulation, membranes, and interiors, and it helps your property stay resilient through the next storm.
Summary
You’ve seen what storm damage can do, so act fast, inspect carefully, and repair in the right order. Secure the site, stop active leaks, and dry water-damaged areas before they spread. Restore the roof, flashing, and exterior openings, then document everything for your claim. Finally, reinforce drainage, maintain roofing, and monitor problem areas so you’re ready for the next storm. Quick action, precise repairs, and steady prevention protect your building.