
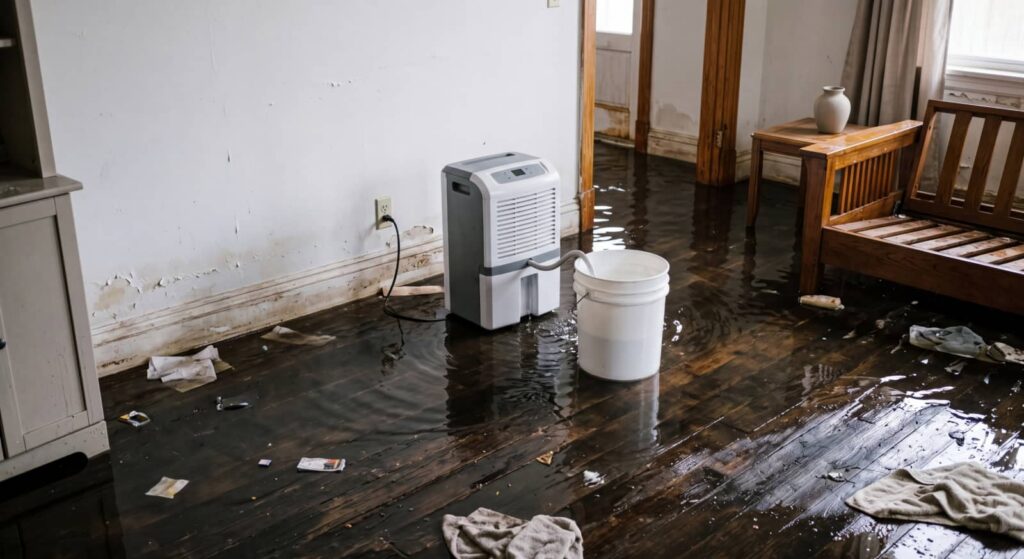
When your property is flooding, you need to stop the source fast and begin extraction immediately. Emergency Water Extraction Process starts with shutting off water, isolating affected rooms, and using pumps and vacuums to remove standing water from floors and carpets. Technicians then check walls, cabinets, and other hidden spaces for trapped moisture. What happens next determines whether you prevent deeper structural damage or allow it to spread.
Key Takeaways
- Stop the water source immediately by shutting off the main supply or nearest valve if it is safe to do so.
- Remove standing water quickly with high-capacity pumps and vacuums, working room by room to isolate wet areas.
- Extract water from hard surfaces first, then carpeted areas, checking corners, edges, and low spots for hidden water.
- Inspect walls, cabinets, baseboards, and trim for trapped moisture using moisture meters and visual checks.
- Use air movers and dehumidifiers continuously to dry materials, monitor moisture levels, and prevent further damage.
Stop the Flood and Shut Off Water
First, stop the water at its source and shut off the main supply if you can do so safely. You need to act fast, because every minute lets more water spread into floors, walls, and contents.
If the source is a burst pipe, appliance line, or fixture, close the nearest valve, then confirm the flow has stopped. If you can’t reach the shutoff without risk, leave it and call a qualified professional or emergency responder.
Keep everyone clear of wet electrical areas. Once the source is controlled, you’ve contained the active threat and can join the emergency water extraction process with your crew or service provider.
That quick action protects the structure, limits contamination, and keeps you in command.
How Emergency Water Extraction Removes Water
Emergency water extraction starts by removing standing water with high-capacity pumps, truck-mounted vacuums, and portable extractors matched to the depth and spread of the loss.
You’ll see technicians work room by room, isolating wet zones and moving water through discharge lines to a safe exterior point. They adjust suction and hose placement to pull moisture from hard-to-reach cavities, edges, and seams fast.
You’re not waiting for evaporation; you’re reducing the water load immediately so damage doesn’t advance. As the volume drops, crews monitor residual moisture with meters and thermal tools, then recheck hidden areas.
This coordinated response helps your property stay controlled, documented, and ready for the next drying phase. When your team acts quickly, you belong to a process that protects the structure and limits secondary loss.
Remove Standing Water From Floors and Carpets
You must remove standing water from floors and carpets immediately to limit saturation and secondary damage.
Use rapid extraction equipment to pull water from hard surfaces first, then apply carpet extraction steps to draw moisture from the carpet pile and backing.
Keep moving methodically so you can reduce water load fast and prepare the area for drying.
Rapid Water Removal
Swift water removal starts with extracting standing water from floors and carpets before it can spread deeper into the structure. You need to act immediately, because every minute of delay raises the risk of subfloor saturation, wicking, and structural damage.
Use high-capacity extraction equipment to pull water from hard surfaces first, then move across carpeted areas with steady overlap to reduce residual moisture. You’ll protect the property and support your team’s response by clearing pathways, isolating affected zones, and monitoring where water migrates.
Check edges, corners, and low spots, since these areas often hold hidden volume. As you work, keep the space organized and controlled so everyone on site can move with confidence and stay focused on recovery. Rapid removal sets the pace for the rest of the drying process.
Carpet Extraction Steps
Start carpet extraction by removing standing water from the floor surface and the carpet face as soon as access is clear.
You should position a high-capacity extractor at the wettest point, then pull water in overlapping passes to keep lift even and fast. Work from the perimeter toward the center, and don’t overwork saturated seams.
If water has reached the pad, lift a corner and verify penetration before you continue. Use weighted extraction on traffic lanes and along baseboards where moisture hides.
Check each pass with your hand and meter so you can track progress with the crew. Keep hoses clear, maintain suction, and move urgently.
Your team depends on this step to stabilize the room, protect materials, and prepare every affected surface for drying now.
Check for Hidden Moisture in Walls and Cabinets
After standing water is removed, inspect walls and cabinets for trapped moisture, since hidden water can keep damage spreading even when surfaces look dry.
You should check baseboards, toe kicks, seams, and wall cavities with a moisture meter, because water often wicks upward or lingers behind finishes.
Open cabinet doors, remove contents, and feel for swelling, soft panels, or cool spots that signal damp materials.
Look for staining, bubbling paint, and warped trim, and mark any affected sections for immediate attention.
If you detect elevated readings, isolate the area and document each location so your team can act fast.
Acting together now protects the property, limits structural deterioration, and keeps your recovery crew aligned on what still needs verification.
Dry and Dehumidify the Affected Area
Set air movers and dehumidifiers immediately to pull residual moisture from walls, flooring, cabinetry, and structural cavities before microbial growth can take hold.
You need balanced airflow across every damp surface, not random placement. Angle air movers to sweep under toe kicks, behind furniture, and along baseboards so evaporation accelerates evenly.
Run commercial dehumidifiers sized for the room’s load, and empty or drain them continuously to maintain output. Keep doors positioned to control the drying chamber, and verify progress with moisture readings in materials, not just the air.
Recheck cold corners, closets, and enclosed cavities where saturation lingers. When you dry methodically, you protect the property, reduce secondary damage, and move with the same disciplined crew that gets flooding under control fast.
What to Do After Water Extraction Ends
Once extraction ends, you must verify moisture levels in all affected materials with a calibrated meter and log readings immediately.
You should keep checking walls, floors, and hidden cavities so you can catch residual moisture before it spreads.
Then clear the drying zone, open airflow paths, and position dehumidifiers and fans to accelerate controlled drying.
Moisture Monitoring Steps
Immediately after water extraction stops, you need to track moisture levels in every affected area to confirm the space is truly drying. Use a calibrated moisture meter to check floors, baseboards, drywall, insulation, and concealed cavities.
Record each reading in the same locations each time so you can spot declines or hidden rebounds. Compare results against unaffected materials nearby, and flag any area that stays elevated or rises again.
If you’re part of the response team, keep your logs tight, consistent, and shared so everyone works from the same data. Check high-risk zones more often, especially where water pooled or seeped behind finishes.
Accurate monitoring helps you catch lingering moisture fast, protect the structure, and keep the recovery effort moving as one coordinated crew.
Drying Area Preparation
After water extraction ends, you need to prepare the area for drying without delay: remove saturated contents, clear loose debris, and open access to floors, walls, and cavities so air can move freely.
Pull up wet rugs, lift furniture legs on blocks if you can, and discard damaged porous materials that can’t dry safely.
Detach baseboards, drill or open hidden cavities when needed, and create unobstructed pathways for dehumidifiers and air movers.
Protect unaffected rooms with plastic barriers and control foot traffic so you don’t re-wet cleaned surfaces.
Keep documenting moisture readings at flooring, framing, and wall assemblies.
You’re not doing this alone; your team can move faster when the space is organized, exposed, and ready for aggressive structural drying.
Frequently Asked Questions
How Long Does Emergency Water Extraction Usually Take?
Usually, you’ll see emergency water extraction take 2–8 hours, depending on water volume, access, and materials. You should act fast, because quicker removal limits damage, supports drying, and keeps your property safer.
Can Water Extraction Handle Sewage Backups Safely?
Yes, you can, but only with sewage-rated extraction and strict containment. You’ll need PPE, disinfection, and biohazard disposal; clean water promises safety, sewage demands control. Don’t DIY it—call trained professionals immediately.
Will My Insurance Cover Emergency Water Extraction Costs?
Yes, your policy may cover emergency water extraction if the loss is sudden and covered. You’ll need to document damage, act fast, and call your insurer now to verify limits, deductibles, and exclusions.
Do I Need to Move Furniture Before Extraction Begins?
Yes, you should move furniture, unless you enjoy aquatic interior design. You’ll protect belongings, speed extraction, and help crews access wet areas. If items are heavy, don’t risk injury—call the team immediately.
Is Water Extraction Different From Full Flood Restoration?
Yes, you’ll get water extraction first, then full flood restoration. You remove standing water quickly, but restoration also dries, repairs, sanitizes, and restores your space so your property feels whole again.
Final Thoughts
When you stop the source and begin emergency water extraction fast, you cut the damage window dramatically. A flooded property can absorb water in minutes, but porous materials may hold it for days, driving mold growth and structural decay. Use high-capacity vacuums, then verify hidden moisture in walls, cabinets, and subfloors. Keep drying equipment running until readings normalize. Your speed, not guesswork, determines recovery success and helps protect the building from lasting contamination.