
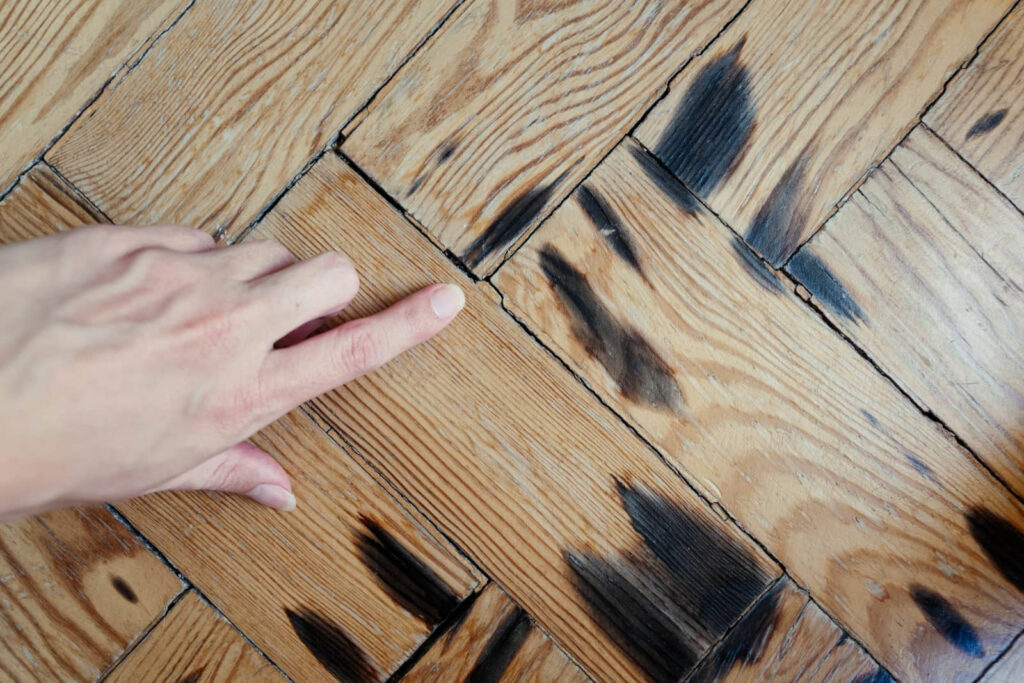
When water reaches your flooring, you need to act fast or the damage can spread beneath the surface. Flooring repair after water damage should begin by stopping the source, drying the area, and inspecting the subfloor before assuming the job is simple. Some materials can be repaired, while others may need full replacement to prevent mold and structural problems. The right choice isn’t always obvious, and the next step depends on what’s hidden below.
Key Takeaways
- Stop the water source, remove standing water, and document visible damage immediately for repairs and insurance claims.
- Use air movers and dehumidifiers to dry flooring and subfloors, monitoring moisture, temperature, and humidity daily.
- Inspect for hidden damage like swelling, warping, mold, soft spots, and delamination before deciding on repair or replacement.
- Repair or replace flooring based on severity, material type, and subfloor condition, including padding, grout, adhesive, or damaged boards.
- Call professionals for moisture testing, hidden cavity drying, and safe restoration to reduce downtime, mold risk, and long-term costs.
What to Do First After Water Damage
If water has damaged your flooring, act fast and stop the source of moisture first. Then remove standing water and begin drying the area immediately. You should shut off supply lines, reset affected appliances, and document visible damage for your claim or repair record.
Move furniture, rugs, and loose items out of the wet zone to reduce staining and transfer. In flooring repair after water damage, you need to inspect edges, seams, and connections for swelling, buckling, or soft spots. Mark unsafe areas so your team can avoid them.
Contact a qualified restoration professional quickly; prompt action helps your home or business recover with less loss and keeps your space safer for everyone who depends on it.
Dry Flooring and Subfloor Fast
Once you’ve stopped the moisture source and removed standing water, move straight into drying the flooring and subfloor with high-velocity air movers, dehumidifiers, and, where needed, targeted heat.
Position airflow so it sweeps across the surface and reaches under loosened edges. Keep doors open enough for circulation, but close off damp zones so you don’t spread humidity through the property.
Run equipment continuously and monitor temperature and humidity with a meter, not guesswork. Lift area rugs, furniture pads, and removable trim so trapped moisture can escape.
In homes and businesses alike, this fast, controlled drying reduces downtime and helps your space feel secure again.
Replace filters on dehumidifiers as needed, and document readings each day. When you stay systematic, you protect the finish and keep the repair moving.
Check the Subfloor for Hidden Damage
After the floor and subfloor are dry on the surface, you need to check underneath for hidden damage, because moisture can leave behind swelling, delamination, soft spots, mold growth, and weakened fasteners.
Lift the flooring carefully and inspect the panels, joists, and seams with a flashlight. Press around stained or warped areas to find bounce, crunching, or flexing that signals structural compromise.
Measure moisture with a meter at multiple points, since trapped dampness can hide in corners and around penetrations. Look for rusted nails, dark streaks, and separating layers that show prolonged exposure.
If you spot musty odor or fungal growth, keep the area ventilated and document the damage.
You’re not alone in this process; a disciplined inspection helps your team protect the building and plan the next step.
Decide Between Repair and Replacement
You should assess the damage severity by checking for warping, cupping, staining, mold, and any loss of structural integrity.
If the affected boards are localized and the subfloor is sound, repair can be effective; if the damage is widespread or the materials have deteriorated, replacement is usually the better option.
Make the decision based on moisture readings, visible condition, and long-term performance, not appearance alone.
Damage Severity Assessment
Start by evaluating how deeply the water has penetrated the flooring and whether the subfloor is affected, because that determines whether repair is realistic or full replacement is safer.
Check for cupping, warping, staining, soft spots, and odors, since these signal how far moisture has spread. Use a moisture meter on the surface and at the edges, then compare readings in damaged and dry areas.
If you see mold, delamination, or swollen seams, the damage is usually more than cosmetic.
In homes and businesses, you also need to verify whether the structure beneath the floor stayed dry and stable.
This assessment gives you a clear path forward and helps you work with a trusted team that protects your space, your schedule, and your peace of mind.
Repair Or Replace
Once the moisture mapping is complete, decide whether the flooring can be dried, stabilized, and restored or whether replacement is the safer option.
You should repair only when the material, adhesive, and subfloor still meet performance limits after drying. Check for cupping, delamination, staining, odor, and movement at seams.
If the boards, tiles, or carpet backing have stayed saturated too long, replacement usually protects your space better. In homes and businesses, you need a floor that supports daily traffic and keeps everyone comfortable.
Confirm the subfloor is dry, flat, and structurally sound before reinstalling anything.
When you choose replacement, remove all compromised layers, sanitize the area, and install new material to manufacturer specs. That approach helps your team regain confidence fast.
Repair Water-Damaged Hardwood, Tile, and Carpet
You should dry water-damaged hardwood immediately with controlled airflow and dehumidification.
Then inspect for cupping, warping, and loose boards before you repair or replace affected sections.
For tile, you need to remove standing water, check grout, adhesive, and the subfloor for moisture intrusion, and reset any loose or cracked pieces once the base is dry.
For carpet, you should extract water fast, lift the carpet and pad to dry the backing and subfloor, and replace materials if contamination or mold has started.
Hardwood Drying And Repair
When hardwood takes on water, dry it quickly and methodically to limit cupping, warping, and joint separation. You’ll protect the room by reducing humidity, lifting airflow, and tracking moisture in boards and subfloor.
Remove standing water, then run dehumidifiers and fans until readings stabilize. Check edges, seams, and finish for signs of distress.
- Measure moisture daily
- Pry up only loose boards
- Replace damaged underlayment
- Sand minor surface deformation
- Refinish after full drying
If boards stay swollen or delaminated, you may need partial replacement to restore structural integrity.
Work carefully, document every step, and keep your space consistent so the repair holds. You’re not fixing flooring alone; you’re protecting a shared environment that should feel solid again.
Tile And Carpet Restoration
Tile and carpet each need a different recovery path after water exposure, and speed matters.
You’ll lift loose tile, inspect grout, and check for hollow spots, cracked joints, or moisture trapped in the underlayment. If the bond has failed, you’ll remove affected sections, dry the slab, and reset the tile with matching adhesive and grout.
For carpet, you’ll extract water fast, pull back edges, and inspect the pad and tack strips. Clean carpet can sometimes be sanitized, dried, and reinstalled, but soaked padding usually needs replacement.
You’ll also check the subfloor for swelling, mold, and odor. When you act quickly, you protect your space, reduce loss, and keep the surface safe, clean, and ready for daily use.
Prevent Mold After Water Damage
After water damage, act quickly to dry the flooring, remove any wet materials that can’t be salvaged, and check the subfloor for trapped moisture.
You protect your space best by keeping humidity low and airflow steady. Use dehumidifiers, fans, and clean air paths to shorten drying time and limit mold growth.
Inspect baseboards, underlayment, and seams daily so you catch hidden dampness early.
- Remove soaked padding.
- Lift warped sections.
- Clean surfaces with approved products.
- Keep indoor humidity below 60%.
- Monitor odor and spotting.
When you stay disciplined, you help your home or business recover safely and confidently.
Your crew can move forward knowing the flooring is drying the right way, and your shared environment stays healthier for everyone.
When to Call a Water Damage Pro
If the water has soaked into the subfloor, spread beyond a small area, or come from a contaminated source, you should call a water damage pro right away.
You also need professional help when flooring stays damp after 24 to 48 hours, buckles, warps, or smells musty. A trained crew can measure moisture, remove damaged material, dry hidden cavities, and check the subfloor for rot or delamination.
If you manage a business, fast response limits downtime and helps protect staff and customers. You don’t have to guess whether repair is enough; a pro can decide between drying, partial replacement, or full removal.
Acting early keeps your space safer, preserves more of your flooring, and helps your home or business get back on track.
Frequently Asked Questions
How Long Does Insurance Usually Take to Approve Flooring Damage Claims?
You’ll usually wait 1–4 weeks for approval, though simple claims can move faster and complex ones take longer. You can speed things up by submitting photos, receipts, and inspection access promptly.
Can I Use Dehumidifiers on Laminate Flooring Safely?
Yes—you can, but you’ll need to control airflow and moisture. Most flooring failures start with trapped water, so you should lift planks, dry the subfloor, and monitor swelling before you reheat or reinstall.
What Signs Show Water Damage Has Reached Wall Framing?
You’ll spot wall-framing damage by soft drywall, staining, swelling, peeling paint, musty odors, warped trim, and spongy studs. If you press a wall and it flexes, moisture’s likely reached framing, so you should inspect immediately.
Do I Need a Permit for Major Flooring Replacement?
Yes, you usually need a permit if you’re replacing subflooring, changing structural elements, or altering plumbing or electrical systems. Check your local building department first, because rules vary and unpermitted work can delay approvals.
How Can I Estimate Flooring Repair Costs Before Inspection?
You can estimate costs by measuring damaged square footage, noting material type, checking subfloor risk, and pricing drying, removal, and replacement locally. Add contingency for hidden damage, because inspections often reveal extra repairs.
Summary
When water damage hits, you need to act fast: stop the source, dry the flooring and subfloor, and inspect for hidden structural damage. Then decide whether repair or replacement gives you the best long-term result. Hardwood, tile, and carpet each need targeted treatment, and mold prevention can’t wait. If the damage runs deeper than it looks, call a pro. Quick action keeps the floor from becoming a house of cards.