
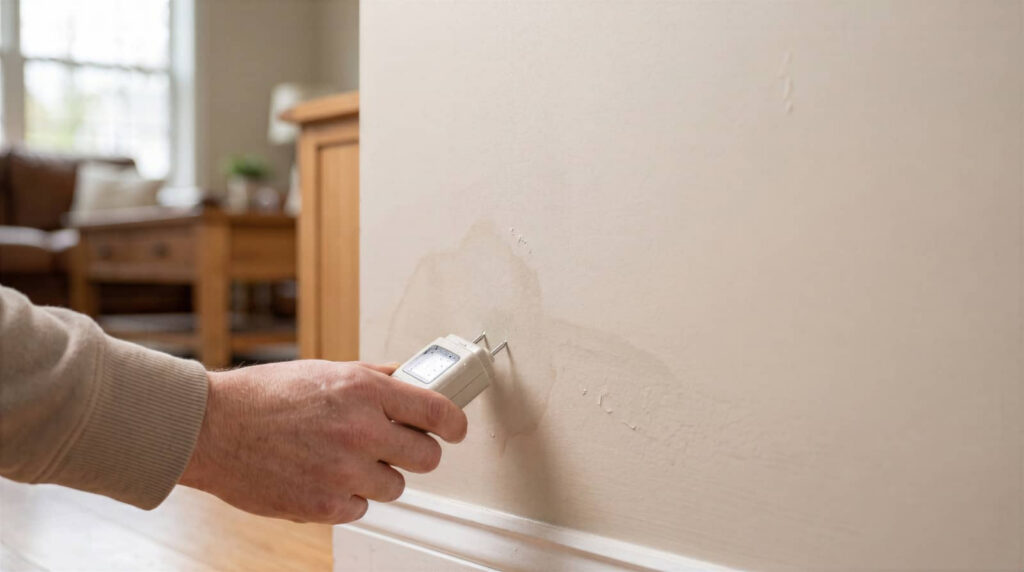
Hidden moisture can keep spreading long after a leak stops, even inside walls and flooring you can’t see. Repair water damage after leak starts with shutting off the source, cutting power to wet areas, and checking for damp insulation, swollen drywall, and warped subfloors right away. Fast drying can help limit mold and structural damage, but some materials may not be salvageable. Knowing what to remove, what to dry, and when to call a pro can change the outcome.
Key Takeaways
- Shut off the water source immediately and cut power to affected areas for safety before starting repairs.
- Inspect walls, ceilings, baseboards, and floors for hidden moisture, then mark suspect areas for follow-up.
- Remove standing water fast, increase airflow, and use dehumidifiers to dry cavities, framing, and drywall.
- Check damaged materials for swelling, soft spots, or discoloration, and replace severely affected sections instead of drying them.
- Verify dryness with a moisture meter and watch for mold, odors, or sewage signs; call professionals for large or hazardous leaks.
Stop the Leak and Cut the Power
Shut off the water source as soon as you spot a leak, then cut power to any affected area if water is near outlets, appliances, or wiring.
Use the main valve, the fixture stop, or the nearest shutoff you trust, and verify the flow has stopped. If you can’t reach the panel safely, stay clear and call a licensed electrician.
Remove only small, dry items if you can do so without standing in water. You’re protecting your home and your crew’s safety, so act fast and stay methodical.
Once the area’s safe, you can begin to repair water damage after leak conditions with confidence. Quick isolation limits structural exposure, reduces electrical risk, and keeps the response controlled.
Find Hidden Water Damage After a Leak
Once the leak is controlled, you need to find where water has traveled beyond the obvious wet spot. Inspect adjacent walls, ceilings, baseboards, and flooring for staining, swelling, peeling paint, or soft spots.
Use a flashlight to check under sinks, behind appliances, and along cabinet bottoms. Feel for cool, damp surfaces and listen for hollow or warped areas in drywall and subflooring.
Trace plumbing lines, supply valves, and fittings for residue or rust that points to migration. If you smell a musty odor, inspect insulation, closets, and crawl spaces nearby.
Mark every suspect area so you can map the spread and work with your crew or contractor on the same damage pattern. Hidden water often follows framing and seams, so check each boundary carefully before you move on.
Dry Water Damage Before Mold Starts
First, you need to stop the moisture source so no more water enters the damaged area.
Next, remove any standing water with pumps, wet vacs, or absorbent materials.
Then set up airflow and dehumidification right away.
Open hidden cavities and dry framing, insulation, and drywall thoroughly before mold can start growing.
Stop Moisture Source
Before you dry anything else, stop the leak or moisture source so the damage doesn’t keep spreading.
Shut off the main water supply if a pipe or fixture is involved, then isolate the affected area with valves, clamps, or a temporary patch if you can do so safely.
If rain, roof, or exterior intrusion is the cause, cover the opening and seal exposed edges until repairs begin.
Disconnect appliances, power to wet circuits, and any equipment that’s feeding the problem.
Check adjacent rooms, crawl spaces, and attics for hidden seepage, because moisture often travels beyond the visible stain.
Document the source, then verify it’s controlled before you start drying.
When you act quickly and methodically, you protect your space, your crew, and the structure from deeper loss.
Remove Standing Water
Start removing standing water immediately to limit swelling, staining, and mold growth. You’ll protect drywall, flooring, and trim by acting fast with a wet/dry vacuum, mop, or pump.
Prioritize shallow pools first, then work outward so you don’t spread contamination. Wear gloves and non-slip shoes, and keep electrical cords away from wet areas. Open doors for safer access, and place towels to catch runoff.
If water keeps returning, reassess the leak source before you continue.
- Vacuum water from hard surfaces
- Squeegee pools toward a drain
- Blot carpet with absorbent towels
- Empty recovery tanks often
- Check corners and edges for residue
Dry Hidden Cavities
Once the visible water is gone, dry the hidden cavities that trap moisture in drywall, baseboards, subfloors, and framing.
You’ll need to open small inspection points, remove wet insulation, and place air movers so airflow reaches inside wall and floor assemblies.
Use dehumidifiers to pull vapor from the air and keep relative humidity low.
Check moisture with a meter, not just touch, because surfaces can feel dry while cavities stay wet.
If you hear dripping or smell mustiness, keep drying.
Protect your crew’s shared space by separating damp materials from clean areas and replacing any saturated trim or drywall that won’t dry fast enough.
Fast, directed drying helps you stop mold, preserve structure, and restore a healthy indoor environment together.
Inspect Drywall, Flooring, and Insulation
Inspect the drywall, flooring, and insulation right away for swelling, discoloration, soft spots, warping, and any signs of trapped moisture. You’ll catch early changes that point to hidden wet areas before they spread into neighboring rooms.
Check baseboards, seams, and edges where water often lingers, and note any musty odor.
- Press drywall gently to detect weak areas.
- Look for lifted flooring or cupped boards.
- Probe insulation near the leak path.
- Mark affected zones for follow-up checks.
- Compare both sides of walls for differences.
Use a flashlight and moisture meter if you have one, and document what you find so your team can stay aligned. Clear inspection helps you protect the space you share.
Repair or Replace Damaged Materials Safely
You should assess each wet material for salvageability by checking for structural integrity, persistent moisture, and visible microbial growth.
If drywall, insulation, flooring, or framing is severely warped, delaminated, or contaminated, replace those sections rather than trying to dry them in place.
Use safe removal and disposal practices so you don’t spread moisture or compromise indoor air quality.
Assess Material Salvageability
A careful salvage assessment helps prevent hidden damage from spreading. You should inspect each wet material for swelling, delamination, staining, and musty odor, then document moisture levels with a meter.
If drywall, insulation, or underlayment stays damp after drying, it likely won’t perform safely. Porous materials trap contamination, so you’ll protect your home and your team by separating cleanable surfaces from absorbent ones.
Check framing for softness, fastener corrosion, and mold growth, and confirm whether finishes have warped beyond recovery. When you compare materials, focus on structural integrity, drying time, and indoor air quality risk. Your best call is the one that keeps the space stable and healthy.
- Measure moisture at multiple depths
- Look for visible distortion
- Test for lingering odor
- Verify structural soundness
- Record salvage decisions
Replace Severely Damaged Sections
When salvage checks show swelling, crumbling, deep staining, or persistent moisture, cut out and replace the damaged sections instead of trying to patch failed material. You protect the rest of your structure by removing drywall, baseboard, insulation, subfloor, or framing that won’t dry cleanly or safely.
Use a utility knife, pry bar, and moisture meter, and keep cuts square so new material fits tight. Bag debris promptly, wear gloves and eye protection, and isolate the work area to limit dust and spores.
Before you install new sections, dry the cavity, verify no active leak remains, and treat any exposed framing if needed. Then match thickness, fasten properly, seal seams, and restore finishes so your space feels whole again.
Know When to Call a Water Damage Pro
If water has soaked drywall, spread beneath flooring, or reached insulation or framing, call a water damage pro right away. You’ll get faster drying, moisture mapping, and a clear damage scope, which helps you stay in control when the leak feels overwhelming.
Pros use meters and thermal imaging to find trapped water you can’t see. They also remove contaminated materials safely and document the loss for repairs.
- Warped baseboards or cupped flooring
- Stains that keep growing after drying
- Musty odors that linger in rooms
- Electrical outlets or HVAC areas got wet
- Soft drywall, swelling, or crumbling edges
If the leak involved sewage, a broken pipe, or a large area, don’t wait. You’re not handling it alone; you’re choosing a team that knows the job.
Prevent Hidden Moisture After Repairs
After repairs, you still need to verify that every hidden cavity is dry, because trapped moisture can linger behind new drywall, under flooring, or inside framing.
Use a moisture meter on base plates, studs, subfloor, and insulation, and compare readings to dry areas in the same room. Run dehumidifiers and fans until humidity stays stable and materials test normal.
Inspect seams, trim, and vents for cool spots or odors that suggest hidden dampness. Seal openings only after you confirm dryness, and document readings so you can track changes.
If you share the space with others, keep them informed about drying progress so everyone stays aligned. Quick follow-up checks protect indoor air quality and help your repaired area stay solid, safe, and ready for daily use.
Frequently Asked Questions
How Soon Should I Inspect for Water Damage After a Small Leak?
You should inspect within 24 hours, ideally right away, because moisture can spread fast. Check drywall, flooring, insulation, and framing, then dry everything completely so you protect your home’s structure and indoor air quality.
Can a Ceiling Leak Damage Wiring Behind Walls?
Yes—a ceiling leak can quietly trouble wiring behind walls. You should shut off power, inspect outlets and fixtures, and call a licensed electrician; moisture can corrode conductors, weaken insulation, and raise fire risk.
What Tools Detect Moisture Hidden Inside Subfloors?
You can use pin-type moisture meters, pinless scanners, infrared cameras, hygrometers, and borescopes to detect hidden moisture in subfloors. You’ll find wet zones fast, verify drying, and protect your team’s shared work standards.
Is It Safe to Use Fans on Wet Insulation?
No, you shouldn’t use fans directly on wet insulation; they’ll dry the surface, not the core. You’ll need to remove saturated insulation, inspect framing, and dry the cavity with dehumidification, like a medieval bellows!
How Do I Know if Repaired Areas Still Hold Moisture?
You can tell by measuring with a moisture meter, checking for cool spots, staining, warping, or musty odor, and confirming readings match dry areas. If values stay elevated, you’ve still got trapped moisture.
Wrap-Up
When you stop the leak and restore the flow of air, you’re like a careful lighthouse keeper, guiding your home back from fog. Keep checking walls, floors, and insulation for hidden dampness, because moisture can travel like an unseen tide. Dry materials completely, replace what’s weakened, and call a pro if damage runs deep. If you act fast and methodically, you’ll keep mold from taking root and protect your home’s structure.