
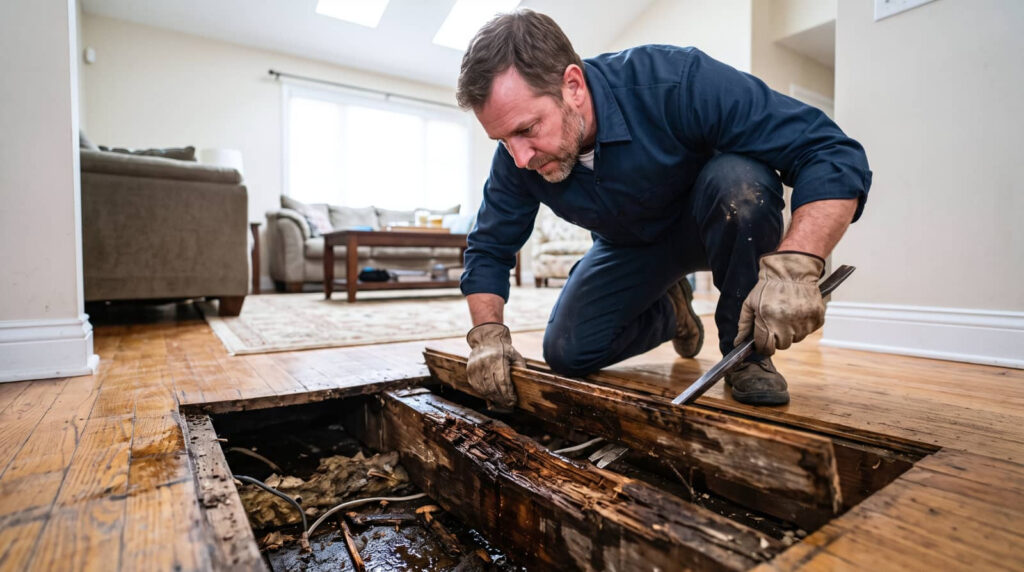
After water damage, you need to assess more than what you can see. Structural repair after water damage should account for hidden moisture that can weaken framing, swell subflooring, and compromise ceiling components long before surfaces appear dry. You’ll also need to identify materials that can’t be salvaged, remove mold-risk areas, and verify that repairs meet code. The extent of restoration often depends on what’s behind the finish materials, and that’s where the real decisions begin.
Key Takeaways
- Assess framing, subflooring, ceilings, and hidden cavities with moisture readings to map damage accurately.
- Watch for sagging floors, soft subfloors, bowed ceilings, sticking doors, and cracked or displaced framing.
- Replace weakened materials, including swollen drywall, warped trim, delaminated plywood, saturated insulation, and corroded connectors.
- Remove mold-contaminated or structurally compromised sections, then clean and contain the work area to limit spread.
- Hire a licensed professional to confirm code-compliant repairs, obtain a written scope, and plan safe restoration.
Assess Water Damage Before Repairs
Before you begin any structural repair, you need to assess the full extent of the water damage so you can identify which materials have weakened and which still hold sound.
You’ll protect the work by checking framing, subflooring, ceiling supports, and adjoining assemblies for moisture-related loss. Use a moisture meter, inspect hidden cavities, and compare readings across affected areas so you can map the damage accurately.
In structural repair after water damage, you don’t guess; you document what needs replacement and what can stay in service. That careful approach helps you join a team of homeowners who restore safely and confidently.
Once you know the scope, you can plan repairs that match the structure’s actual condition, reduce waste, and support a stable, lasting result.
Signs Your Structure Needs Repair
Once you’ve mapped the damage, the warning signs usually become clear: sagging floors, cracked or displaced framing, soft or spongy subflooring, bowed ceilings, and trim or finishes that no longer sit square.
You may also notice doors that stick, gaps opening at joints, or drywall that flexes when you press it. These shifts tell you the structure isn’t carrying loads as it should.
Don’t ignore faint creaks, uneven slopes, or surfaces that feel resilient where they should feel rigid. When these symptoms appear together, they often point to hidden movement that deserves prompt attention.
A qualified restoration team can verify the extent, confirm stability, and help you protect your home. You’re not overreacting—you’re responding to damage before it spreads further.
Which Materials Need Replacement?
When water has compromised structural components, you’ll often need to replace any material that has lost strength, shape, or load-bearing capacity.
You should remove swollen drywall, delaminated plywood, warped trim, and insulation that stayed saturated long enough to trap moisture or contaminants. If metal connectors show corrosion, replace them too, because their holding power can’t be trusted.
For composite materials, watch for softening, crumbling, or separation at seams; those conditions usually mean the part can’t perform as designed. You’re not overreacting by choosing replacement when drying won’t restore original properties.
A qualified restoration team can help you target only the affected materials, protect the rest of your structure, and keep your home safe, stable, and ready for the next repair step.
Check Framing, Subflooring, and Joists
Check the framing, subflooring, and joists for any signs of structural weakness, since these components carry loads that moisture can compromise quickly.
You’ll want to inspect for sagging, soft spots, splitting, and fastener failure, especially where water pooled or wicked upward. Use a level, probe, and moisture meter to confirm whether members still hold shape and strength.
If joists deflect unusually or subfloor panels feel springy, the assembly may need reinforcement before finishes go back in. Look closely at bearing points, connections, and spans, because hidden movement often starts there.
When you verify sound structure now, you protect the whole repair and keep your home’s recovery on solid footing. You’re not fixing this alone; careful evaluation gives your team a clear, confident path forward.
Remove Mold and Moisture-Damaged Materials
You’ll need to remove any mold-contaminated materials and any framing or sheathing that’s softened, swollen, or structurally compromised.
Cut out damaged sections cleanly so you can expose sound material and verify the full extent of the affected area.
Bag and dispose of debris promptly using safe disposal practices to limit spore spread and keep the work area controlled.
Mold-Contaminated Material Removal
Mold-contaminated materials and components weakened by moisture should come out before structural repair begins. You protect the rest of your structure by removing porous items that can’t be cleaned to a safe standard, including drywall, insulation, carpet padding, and other affected finishes.
You’ll want trained technicians to contain the work area, wear proper protective equipment, and use controlled demolition methods that limit spore spread. After removal, they should bag debris promptly, clean adjacent surfaces, and verify that hidden contamination isn’t left behind.
This step helps you regain a healthier, more stable space and keeps later repairs on solid ground. When you address contamination thoroughly now, you give your home the best chance for dependable restoration and a cleaner return for everyone inside.
Moisture-Damaged Framing
Once contaminated finishes are out, inspect the framing for moisture-related damage, decay, and mold growth before you rebuild.
You’ll want to verify each stud, joist, and plate for softening, warping, splitting, or loss of bearing strength. Probe suspect members with a moisture meter and a screwdriver so you can confirm whether the wood has stayed structurally sound.
If the framing still reads elevated moisture, let the area dry to an acceptable level before enclosure. You may need to remove compromised sections and replace them with dimensionally matched lumber, then fasten everything to sound structure.
As you work, keep the area clean and organized so your crew stays confident and coordinated.
Careful assessment now helps your repair team restore a stable, durable framework you can trust together.
Safe Disposal Practices
Before you rebuild, remove any mold-contaminated or moisture-damaged materials in a controlled, safe sequence so you don’t spread spores or compromise the remaining structure.
You’ll want to isolate the work area, shut off HVAC returns, and wear gloves, eye protection, and a fitted respirator.
Cut out porous items that can’t be fully dried, including wet drywall, insulation, carpet pad, and warped subfloor sections.
Bag debris immediately, seal bags, and move them through a clean path to the exterior.
Keep salvageable framing separate from scrap, then clean and dry it before inspection.
Dispose of waste per local rules, and document what you remove.
When you follow this process, you protect the structure and your team, and you set up a safer, stronger restoration together.
Repair Ceiling Framing and Drywall
Inspect the ceiling framing first, then assess the drywall for sagging, cracking, or soft spots caused by water intrusion.
You should probe joists, blocking, and hangers for warping, splitting, or corrosion, because weakened members can’t safely support new finishes.
If you find damaged framing, sister or replace the affected pieces so the ceiling regains full strength and alignment.
Next, cut out compromised drywall to clean edges, leaving sound material firmly fastened.
Install new boards with proper fasteners, then tape, mud, and sand the joints for a flat surface.
You’re not alone in this process; careful repair restores both structure and comfort.
Before closing the ceiling, confirm the cavity is dry and stable, so your home can move forward with confidence.
What Do Water-Damage Repairs Cost?
Water-damage repair costs can range widely because the bill depends on how much structural material got wet, how long moisture stayed in place, and what needs replacement.
You may pay for demolition, drying, disposal, and rebuilding, with framing, subflooring, and ceiling supports often driving the total. Small, contained repairs can stay modest, while hidden saturation inside walls or floors can escalate quickly.
Material choices, access limits, and the extent of matching finishes also affect pricing. If you document damage early and track affected areas, you’ll understand estimates better and feel more in control.
A clear scope helps you compare bids fairly and avoid surprises. In a well-managed project, your repair plan should restore strength, stability, and comfort without unnecessary work.
Hire a Pro for Safe Structural Repair
When structural members have been softened by moisture, you should hire a licensed pro to assess the damage and carry out repairs safely.
They’ll check framing, subflooring, and ceiling supports for hidden loss of strength, then specify the right fix for each area. You get a safer result when repairs follow code, load requirements, and drying verification, not guesswork.
A qualified contractor can replace compromised lumber, sister joists, reinforce beams, and coordinate permits if needed. That keeps your home stable and your household protected.
You’re not handling this alone; you’re working with specialists who know how to restore your space with care.
Ask for a written scope, moisture readings, and clear timelines so you can move forward with confidence together.
Frequently Asked Questions
How Long Does Structural Drying Usually Take?
Structural drying usually takes 3 to 5 days, but you may need longer if materials stayed saturated. You’ll get faster results with strong airflow, dehumidification, and monitoring, and you’re not alone throughout the process.
Can Insurance Cover Hidden Water Damage Repairs?
Yes, your policy can cover hidden water damage repairs if the cause’s sudden and accidental. You’ll need prompt documentation, adjuster inspection, and repair estimates. Together, you and your insurer can verify concealed structural losses.
Should Electrical Wiring Be Inspected After Flooding?
Yes, you should inspect wiring after flooding because water can corrode insulation and connections. You’ll protect your home and everyone in it by having a licensed electrician test circuits, replace damaged components, and restore safe, reliable power.
Is Temporary Shoring Needed During Structural Repairs?
Yes, you may need temporary shoring if you’re repairing load-bearing framing, subflooring, or ceiling supports. It keeps your structure stable while you work, and you’ll protect everyone by having a qualified contractor assess the load conditions.
Can Salvageable Wood Be Disinfected and Reused?
Yes, you can disinfect some salvageable wood and reuse it. Time heals many wounds, and you’ll assess moisture content, clean thoroughly, treat for mold, then confirm structural integrity before reintegration.
Final Thoughts
When water has compromised your home, you’ll want to treat the damage as more than a surface issue. By evaluating framing, subflooring, joists, and ceiling materials, you can identify what needs to be quietly retired and what can be safely restored. With proper moisture removal, mold remediation, and licensed help, you’ll bring the structure back to a sound, dependable state. Careful repairs now can help protect your home’s strength, safety, and long-term value.