
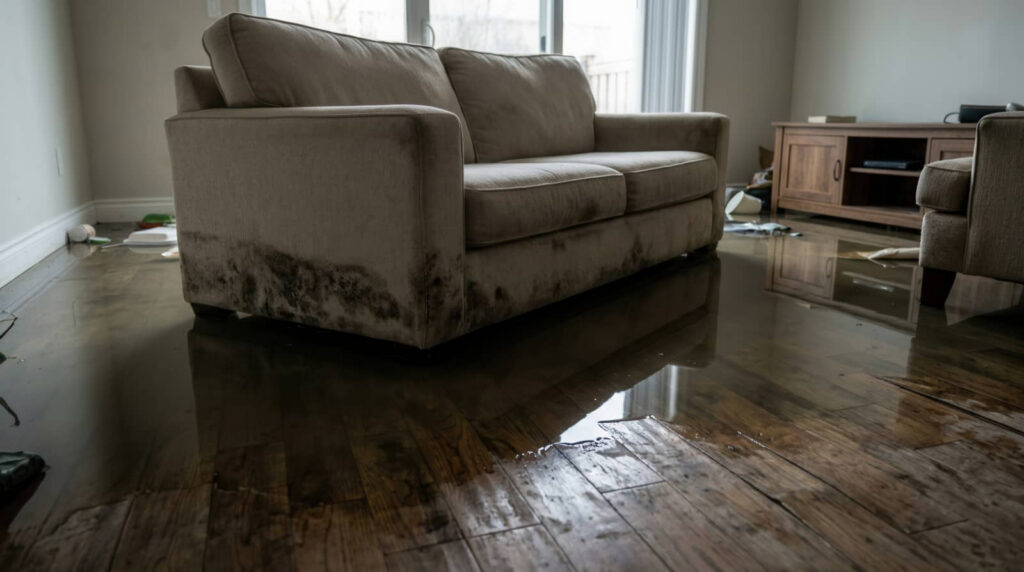
After a flood, your home can feel like a machine with its gears soaked and grinding. You need to stop the water, cut power where needed, and begin extraction fast. Then you dry structural materials, sanitize exposed surfaces, and identify what you can save versus what you must remove. A clear repair plan ties the cleanup to the rebuild, and the next steps matter more than you might think. This guide walks you through water damage repair after flooding, from the first cleanup steps to the final rebuild.
Key Takeaways
- Shut off water and electricity, document damage, and remove standing water as quickly as possible.
- Use moisture meters, dehumidifiers, and air movers to dry walls, floors, and hidden cavities thoroughly.
- Clean and sanitize affected surfaces, and discard porous materials that stayed wet too long.
- Plan repairs in phases, coordinating inspections, drying targets, and material removal before demolition.
- Rebuild only after dryness is verified, then replace framing, insulation, drywall, flooring, and finishes carefully.
What to Do Right After Flood Damage?
Right after flood damage, you should begin with extraction to remove standing water as quickly as possible, then start drying the affected area to limit further deterioration.
In water damage repair after flood conditions, you’ll move methodically: document affected materials, isolate wet contents, and set dehumidifiers and air movers to accelerate evaporation.
Remove saturated items that can’t recover, and separate salvageable possessions for cleaning and monitoring.
Keep air flowing across floors, wall cavities, and concealed spaces so residual moisture doesn’t persist.
Track humidity and material moisture levels until readings stabilize.
This process protects structural components, reduces microbial growth, and helps your team restore the space with confidence.
Stop the Water and Check Safety
Before you do any cleanup, shut off the main water source if it’s still flowing, and disconnect electricity to the affected area only if you can reach the breaker safely and standing water isn’t present near energized equipment.
Then verify the scene from a safe distance. Watch for sagging ceilings, cracked walls, shifting floors, gas odors, and damaged outlets or appliances. If you smell gas, leave immediately and call the utility company.
Don’t enter rooms with submerged cords, exposed wiring, or unstable debris. Wear boots and gloves if you must move through wet areas, but keep your exposure minimal. Mark hazards so everyone on your team knows where not to step. Documenting conditions early makes water damage repair after flooding easier to track and justify.
When you control the source and confirm the area is safe, you’re ready to move forward together with a clear plan.
Start Water Damage Cleanup Fast
You need to act quickly to limit absorption, swelling, and microbial growth. Good water damage repair after flooding always begins with safety, not speed alone.
Remove standing water at once to stop further damage to structural materials and contents.
Start immediate extraction with pumps, wet vacuums, and controlled airflow to reduce moisture load.
Act Quickly
Act quickly after flooding to limit water migration, material deterioration, and microbial growth. You’ll protect the affected area by starting assessment and extraction within hours, not days.
Use moisture meters, infrared checks, and visual inspection to map saturation in flooring, drywall, insulation, and contents. Remove standing water, then document conditions for your repair plan.
Prioritize porous materials that trap moisture and accelerate decay. Coordinate with your restoration team so drying, sanitation, and demolition decisions happen from the same data set.
When you move fast, you reduce odor, staining, and structural compromise, and you help everyone on site work from a shared recovery goal.
Prompt action also shortens downtime, limits replacement costs, and keeps your project organized from cleanup through rebuild. Moisture mapping keeps water damage repair after flooding focused on the areas that truly need work.
Stop Further Damage
Stop further damage by isolating the wet area and starting cleanup as soon as conditions are safe. You should shut off affected circuits, keep people out, and protect clean rooms with plastic sheeting or closed doors. Every hour counts, because delays make water damage repair after flooding more costly and more invasive.
Remove rugs, boxes, and loose furnishings that trap moisture or spread contamination. Document visible damage with photos before you move items, so you can track losses and coordinate repairs.
Open windows only if outdoor conditions help, and run HVAC systems only when they won’t spread damp air. Check walls, trim, and flooring for swelling or staining, and mark affected zones for follow-up.
Begin Immediate Extraction
Begin immediate extraction as soon as the area is safe and power to affected zones is secured.
You should remove standing water with truck-mounted vacuums, submersible pumps, and weighted extractors, working from the perimeter toward the exit to avoid recontamination.
Target carpets, pads, structural cavities, and low points first, because moisture spreads quickly through porous materials.
You’ll want to document readings before and after extraction, then verify that hidden moisture hasn’t migrated into base plates or wall assemblies.
As you work, keep pathways clear so your team can move efficiently and stay coordinated.
Fast extraction lowers microbial risk, protects salvageable materials, and sets up drying equipment for success. Air movement and dehumidification do most of the heavy lifting during water damage repair after flooding.
When you act quickly and methodically, you help your property and your crew move forward together.
Dry Out Walls, Floors, and Air
You should dry walls and floors immediately with targeted airflow to reduce moisture retention and limit structural damage. Thorough drying is the backbone of lasting water damage repair after flooding.
Position fans to move air across wet surfaces, and use dehumidifiers to pull water vapor from the room.
Keep monitoring moisture levels until materials and indoor air reach stable dry conditions.
Wall And Floor Drying
Once standing water is removed, the drying phase targets wall cavities, flooring assemblies, and the surrounding air to reduce moisture to safe levels.
You should open baseboards, inspect insulation, and expose hidden wet zones so trapped water can escape. You’ll also remove wet pads, underlayment, and any swollen materials that can’t return to service.
Measure moisture in studs, subfloors, and framing at consistent intervals, then compare readings to unaffected areas. Keep surfaces clean so contaminants don’t hold moisture against the structure.
Use containment to limit spread into adjacent rooms while the assembly dries. When you track progress methodically, you protect the structure and stay aligned with the same recovery standards your team relies on.
Air Circulation And Dehumidification
With the walls and floors exposed, you should move air continuously and control humidity so the structure can release moisture at a steady rate. Sanitizing early keeps water damage repair after flooding from turning into a mold problem later.
Place high-velocity fans to sweep surfaces, and aim dehumidifiers to pull vapor from the room, not just the wet materials. Cleaning before drying is complete can trap contaminants, so water damage repair after flooding follows a set order.
Keep doors open when it improves airflow, and seal the area when outside air is more humid.
Check temperature, relative humidity, and moisture readings each day so you can adjust equipment quickly.
Remove damp contents that block circulation, and avoid stacking materials against walls.
As you work, you’re protecting the home and helping your team restore a healthy, stable indoor environment.
Maintain this setup until readings level off and both hidden cavities and visible finishes test dry.
Sanitize Surfaces and Prevent Mold
After floodwater extraction and drying, sanitize all affected surfaces to reduce contamination and slow mold growth.
You should clean hard, nonporous areas with detergent first, then apply an EPA-registered disinfectant at the label’s contact time.
Work from the cleanest zone toward the dirtiest so you don’t spread residue. Removing compromised drywall and insulation is a normal part of water damage repair after flooding.
Wear gloves, eye protection, and a mask when you handle contaminated surfaces.
Keep indoor humidity below 60% and maintain airflow so microbes don’t rebound.
Check hidden edges, seams, and underside surfaces, since moisture lingers there.
If you find a musty odor or visible spotting, re-clean and re-sanitize immediately.
Know What Materials Must Go
Decide what you can safely keep and what you must remove before repairs move forward. Knowing what to remove helps you set a realistic scope for water damage repair after flooding.
You’ll usually discard porous items that stayed wet too long, including drywall, insulation, carpet pad, particleboard, and swollen laminate. These materials trap moisture, support mold, and lose structural integrity after flooding.
Remove any wood trim, baseboard, or flooring that has warped, delaminated, or softened. If water reached electrical components, wiring, outlets, or appliances, don’t reuse them until a qualified professional inspects them.
Insulation in walls and ceilings often must go because it dries poorly. When in doubt, test firmness, odor, and staining, then separate salvageable items from contaminated debris.
Your best repair team works like a crew: careful, decisive, and ready to clear out anything that can’t return safely. A written plan keeps water damage repair after flooding on schedule and on budget.
Create a Plan for Water Damage Repair After Flooding
Create a flood repair plan before you start demolition so you can sequence extraction, drying, sanitation, removal, and reconstruction in the right order.
You should document the affected rooms, estimate moisture levels, and assign each task to a clear phase.
Set priorities by risk: stop active leaks, remove standing water, and verify drying targets before you proceed.
Track materials that must be discarded, note what can be cleaned, and schedule inspections at each milestone.
Use dated photos, moisture readings, and written approvals to keep everyone aligned.
When you coordinate trades, share the same scope, timeline, and safety rules so the crew works as one.
A disciplined plan reduces confusion, limits rework, and helps your team move through recovery with confidence together.
Rebuild Walls, Flooring, and Finishes
Once the structure is dry and cleared for rebuild, you can begin restoring walls, flooring, and finishes in a controlled sequence. The rebuild is the final stage of water damage repair after flooding, and it should only begin once moisture readings confirm the structure is dry.
Start with framing checks, then replace damaged drywall, insulation, and vapor barriers to match code and moisture control needs.
Next, install subflooring, underlayment, and finished flooring only after you verify the base is level and dry.
Seal joints, tape seams, and prime repaired surfaces before painting.
After that, reinstall trim, cabinets, doors, and fixtures with accurate alignment and fasteners suited to the material.
You’ll want to inspect each stage for hidden gaps, soft spots, or staining so problems don’t return.
With careful sequencing, you and your home can move from recovery to a clean, stable finish that feels like yours again.
Frequently Asked Questions
How Do I Document Flood Damage for Insurance Claims?
You should photograph every affected area, list damaged items, note dates, save receipts, and record water levels. Then contact your insurer, submit a detailed inventory, and keep copies of all communications for your claim team.
When Should I Call a Professional Water Damage Restorer?
Call a professional water damage restorer immediately if flooding reaches porous materials, electrical systems, or contaminated water; you’ll likely need extraction, drying, sanitation, removal, and reconstruction planning. Many assume DIY works, but hidden moisture often worsens damage.
Can Flood-Damaged Electronics Be Safely Repaired?
No, you shouldn’t power flood-damaged electronics. You can sometimes save them if you disconnect, dry, clean, and inspect them quickly, but corrosion and contamination often make professional evaluation necessary for reliable, safe operation.
How Long Does a Full Flood Restoration Typically Take?
Typically, you’ll need 1-4 weeks; catastrophic losses can stretch longer. You’ll extract water, dry materials, sanitize surfaces, remove unsalvageable items, then plan reconstruction—because nothing says fun like your home becoming a moisture-management case study.
What Permits Are Needed for Flood Repair Reconstruction?
You’ll usually need building, electrical, plumbing, and mechanical permits, plus demolition or floodplain approvals if required. You should check local codes, submit plans, and secure inspections so your rebuild stays compliant and your team feels confident.
Final Thoughts on Water Damage Repair After Flooding
By moving quickly, you turn chaos into order. You stop the water, dry the structure, sanitize every surface, and remove materials that can’t be saved. Then you assess damage, coordinate repairs, and rebuild walls, flooring, and finishes with care. Each step is a link in the chain, and each link matters. With methodical cleanup and precise rebuilding, you restore safety, stability, and value after flooding. Handled in the right order, water damage repair after flooding protects your home’s structure, your health, and your budget.